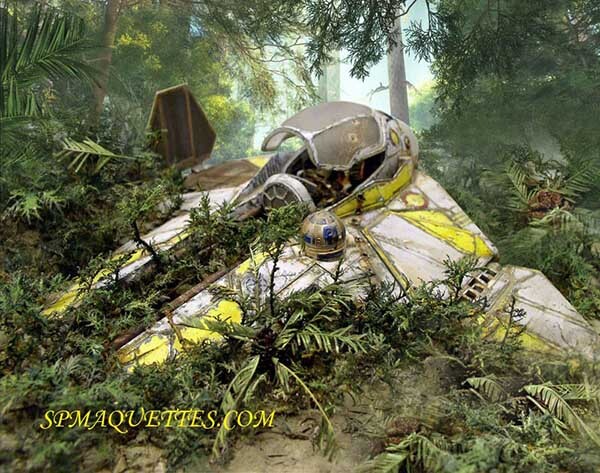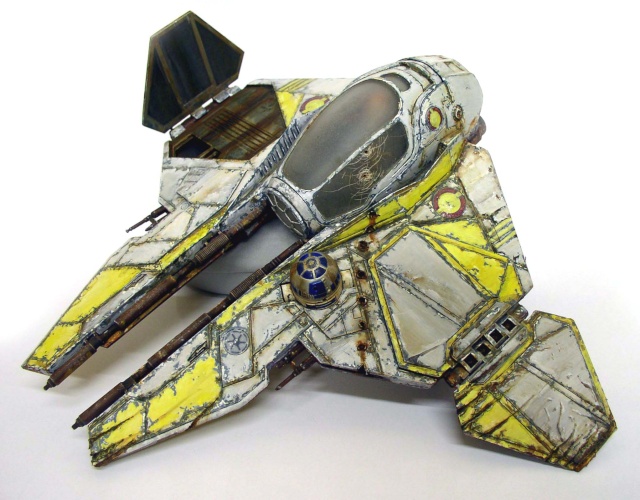
Here’s a technique for weathering a model of a spaceship—Anakin’s Starfighter—a 1/24-scale REVELL model. The model, which was already well-finished to begin with, is a pre-painted “easy kit” (snap-together kit that requires no glue). Since the goal was to turn it into a wreck, it wasn’t repainted. Otherwise, the basic process is the same as for painting a tank...
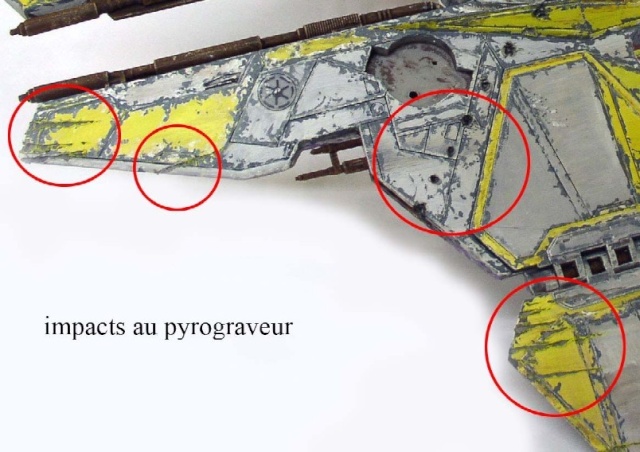
The kit has been modified very little, aside from some redetailing of the cockpit interior. Scratches and bullet holes were etched using a pyrography tool... A very useful tool for working with plastic—and we’ll see later that we can also create “trompe l’oeil” markings...
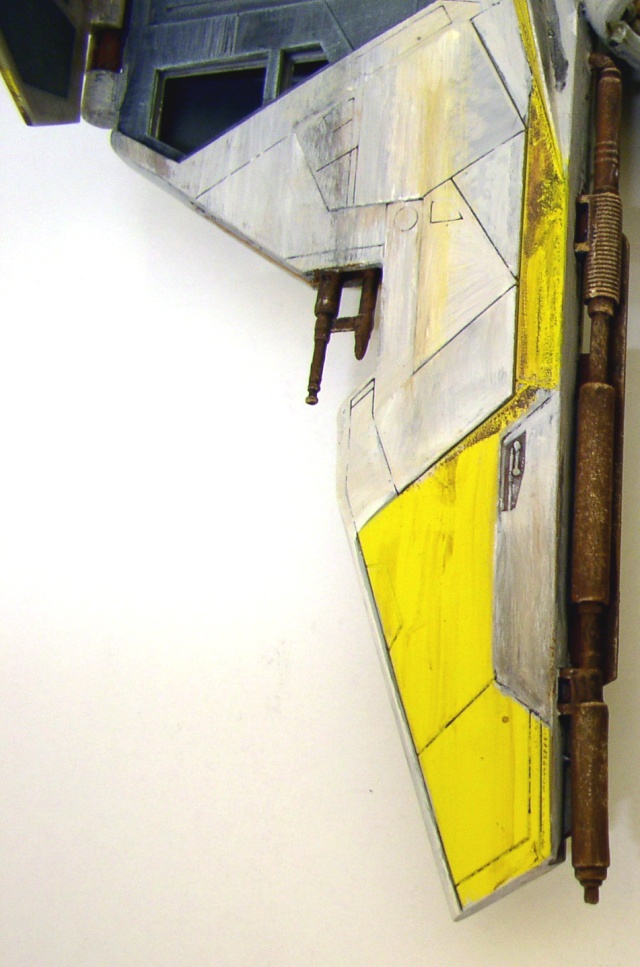
Top photo:
I applied a first coat of medium gray, followed by a second, lighter coat, creating halos on the large surfaces. Same for the yellow. All done with an airbrush...
At this point, we could have moved on to the second part, but in the end, we applied a first layer using Winsor & Newton oil—mixed with white, black, and Sienna...
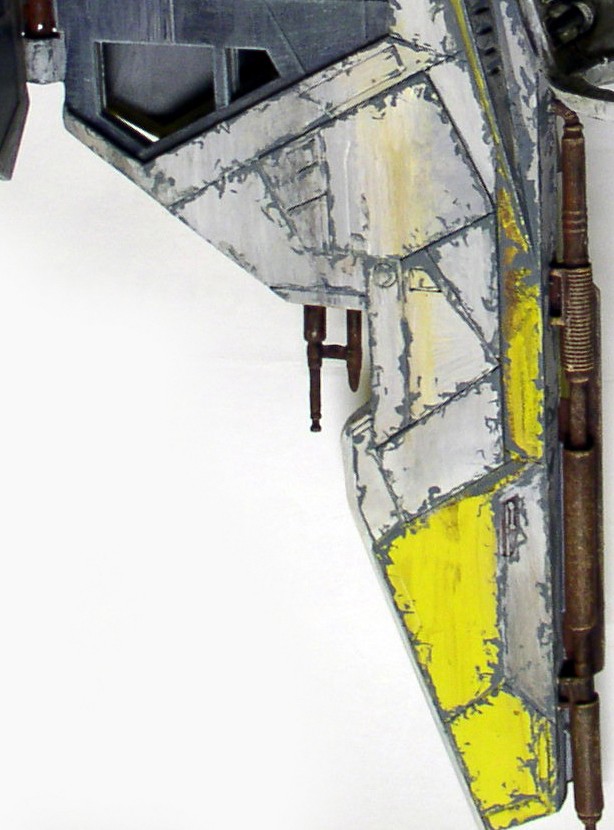
Bottom photo:
The first layer of chipping is applied with a fine brush and Humbrol Gray 124...
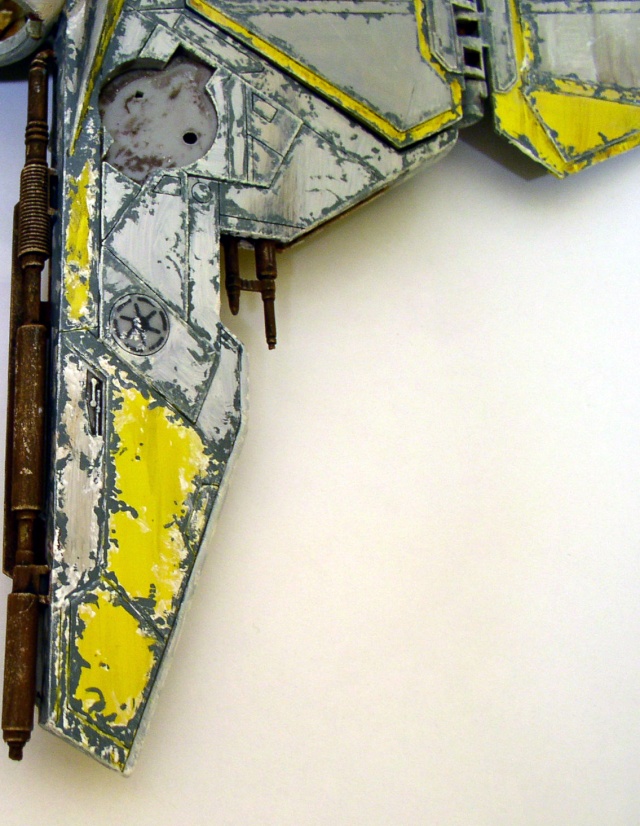
A second one with white in certain places. It takes a long time, but it's essential. We strongly recommend consulting documents on existing, worn-out vehicles. The purpose of all this is to show the gradual deterioration of the aircraft...
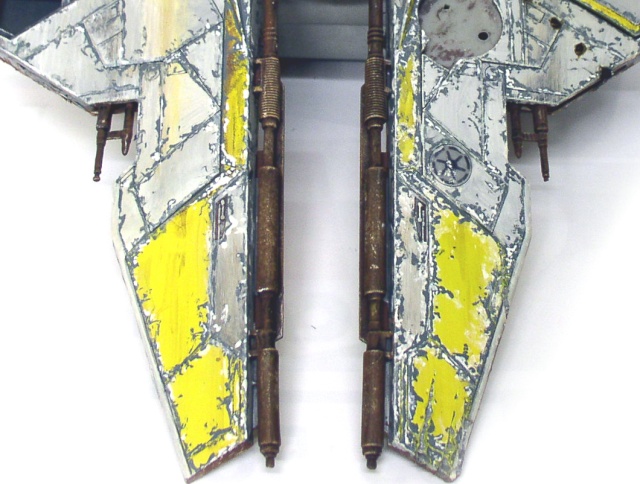
Next, use a flat brush to dry-brush white along the edges...
The cockpit
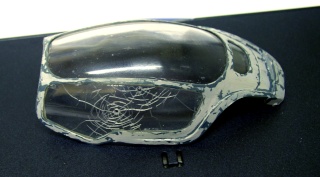
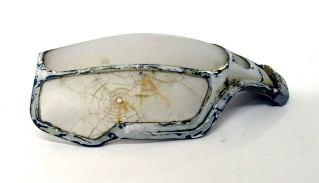
Above: The cockpit canopy sustained two impacts. The holes were made with a mini drill, and the cracks were cut with a utility knife...
Below: The finished stained-glass window. It has been coated with a layer of matte varnish...
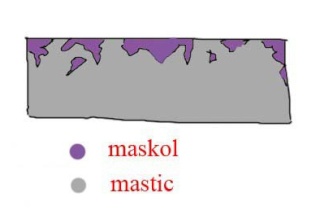
The next step is to work on the lower part of the device—particularly the visible surfaces—where we'll create rust spots...
Paint on chips and scratches in the appropriate places using an old, fine-bristled brush dipped in MASKOL (liquid rubber) to protect certain areas. Let it dry for 1/4 of an hour. The purple color of the MASKOL will become more intense. Next, apply a thick layer of putty to certain areas...
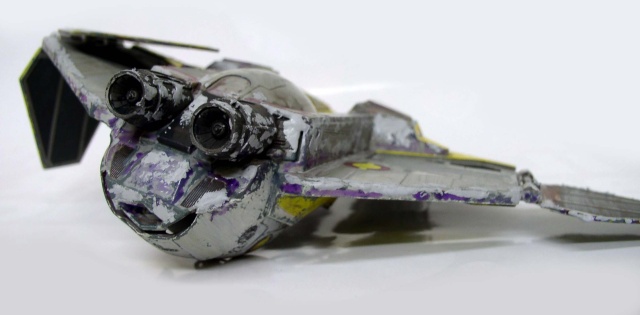
Let the putty dry thoroughly...
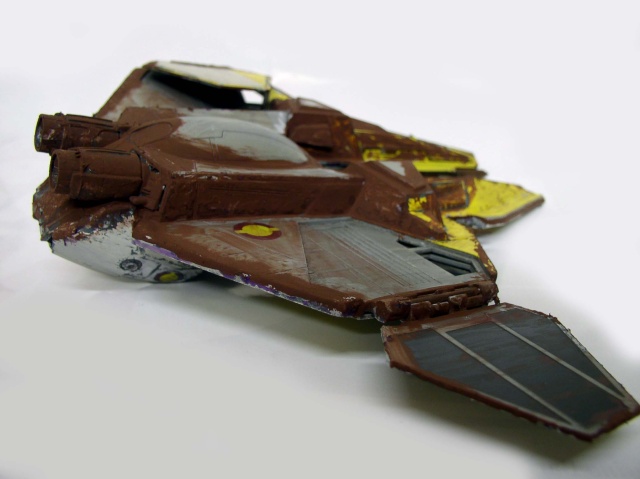
...apply a coat of HUMBROL 177 paint...
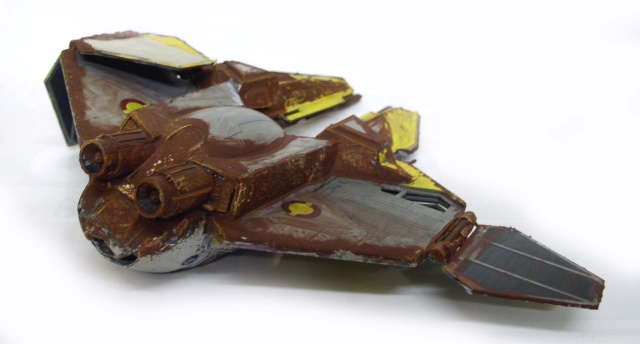
...Next, we'll continue by brushing with 100 - 82 - 63 - 63 + white...
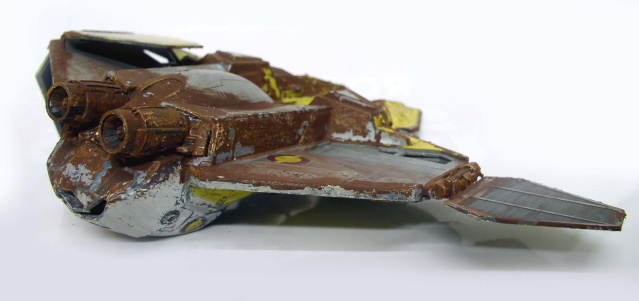
Once everything is completely dry, gently remove the MASKOL, and the color underneath will reappear...
Trompe l'oeil
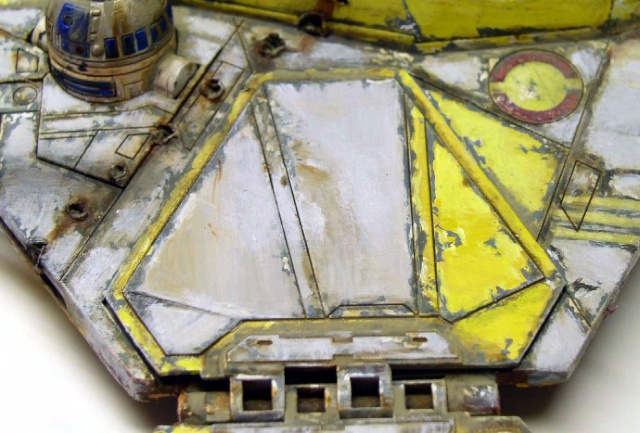
We're going to focus on the upper part of the ship again. Using a fine brush and oil paints from a tube (WINSOR, as always), we'll make it look more realistic by creating "trompe-l'oeil" effects. To create a crack, we’ll start by drawing a dark line to outline it, then add a lighter border to simulate depth and give the impression of roughness. We’ll also create spots that are more or less blurred...
Since the gray and yellow pre-painted panels were not lightened with an airbrush at the start of the painting process, they will be retouched and lightened with a brush using black, white, cadmium yellow, lemon yellow, and other colors...
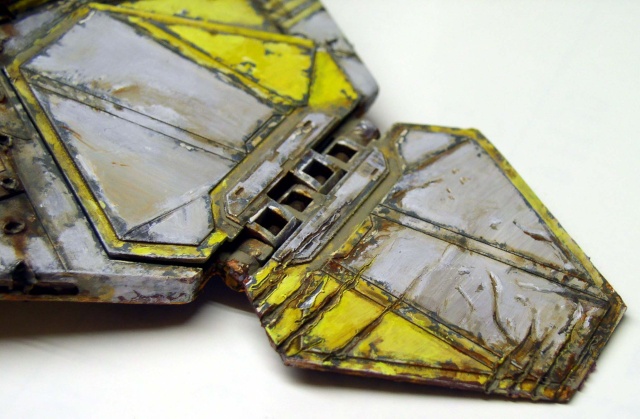
Next, we apply a wash made from thinner mixed with Sienna and Umber to add shading and create depth in the overall composition...
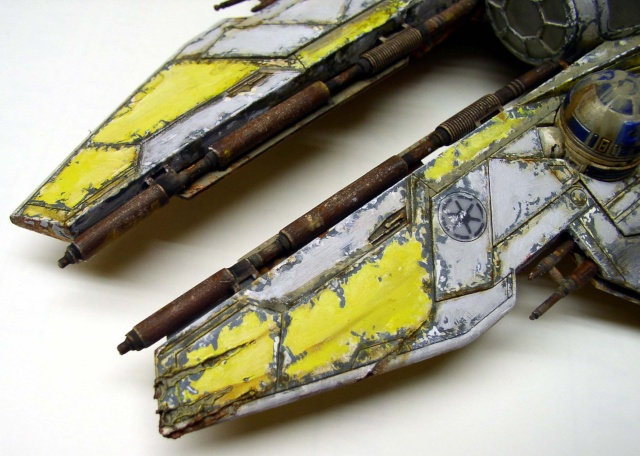
Close-up of the front...
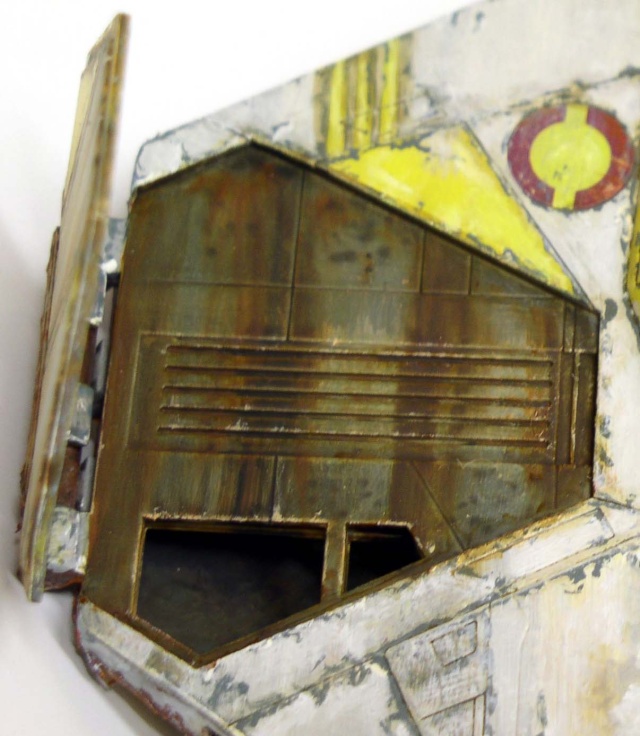
The stabilizer hatch, painted gray with HUMBROL, is given a wash and drips using Sienna, Umber, black, and other colors...
Our hunter is starting to look really worn out!
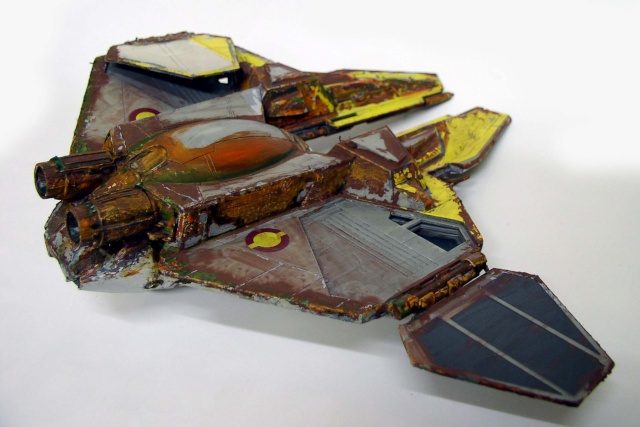
We return to the lower part of the craft to finish up the surroundings. We blend the rusted areas using Sienna, red, orange, cadmium yellow, olive green, and cinnabar green—all mixed with varying amounts of white...
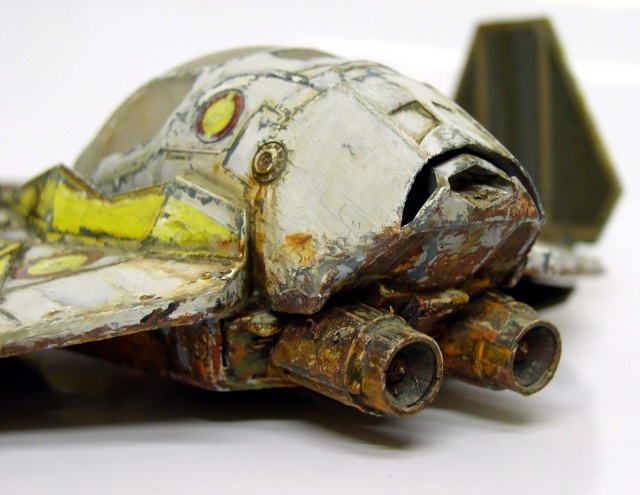
Warm colors will brighten the scene, while cool colors will add depth...
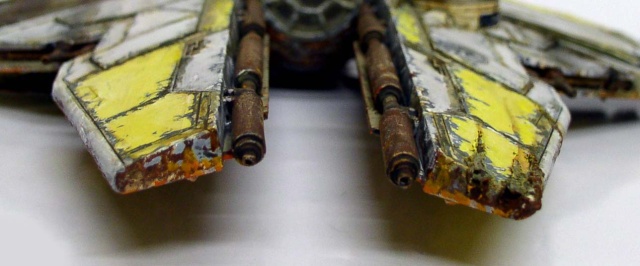
All of this provides a foundation, but painting a model isn’t just about applying color. You have to “feel” things and try to use shades that bring out the model’s best features without distorting it—even if they seem unrealistic. In nature, an object illuminated in a certain way will “produce” colors that aren’t part of the object itself but that blend it into the environment. This is the principle behind painting, where the subject is harmonized with the rest of the scene...
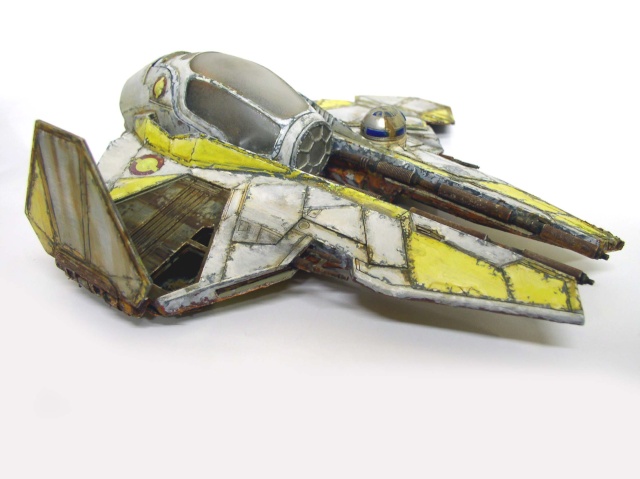
I’ll just quote MIGUEL GIMENEZ (MIG) from his book *EUROMODELISMO RARITIES*: “Above all, you have to understand painting, and to do that, you have to draw inspiration from nature and forget everything you know—and the reason is quite simple: each model represents a different world... I want the reader to understand that it’s very difficult to explain the technique for creating (a destroyed model)—as difficult as explaining music; words are of little help...”
The figurine
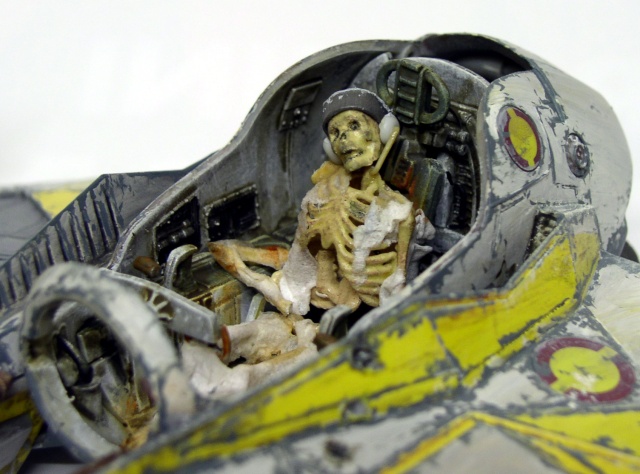
The interior of the cockpit has been redone. The rubber driver from the kit is quickly removed and replaced by... a skeleton whose remnants of clothing are made from a piece of tissue paper mixed with wood glue...
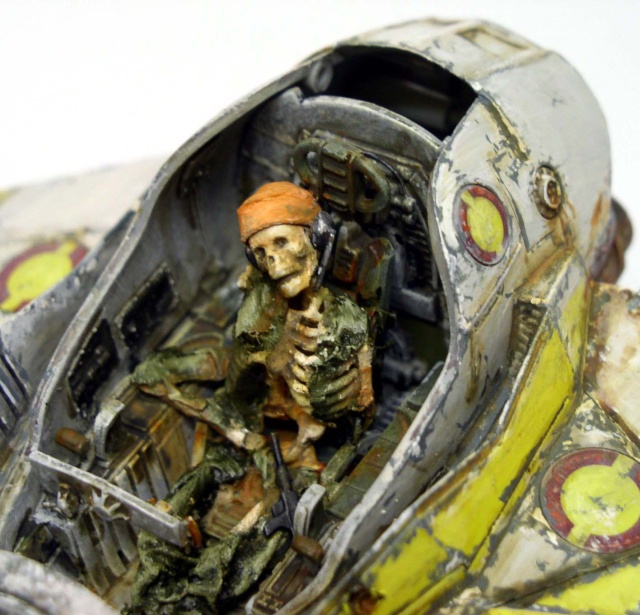
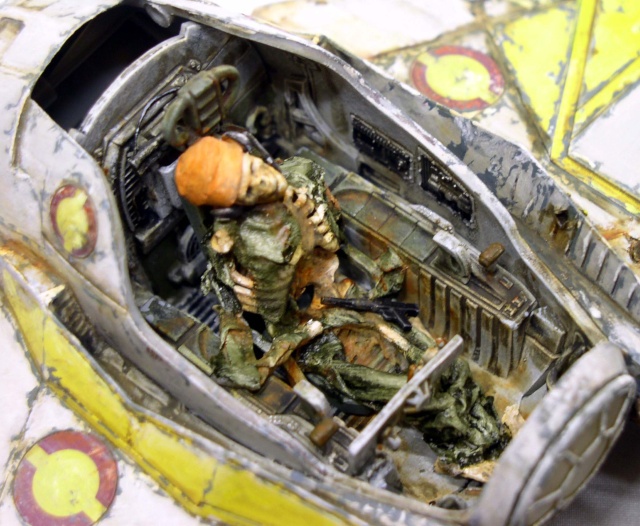
Two views of the cockpit and the pilot after the paint job is finished...
The Setting
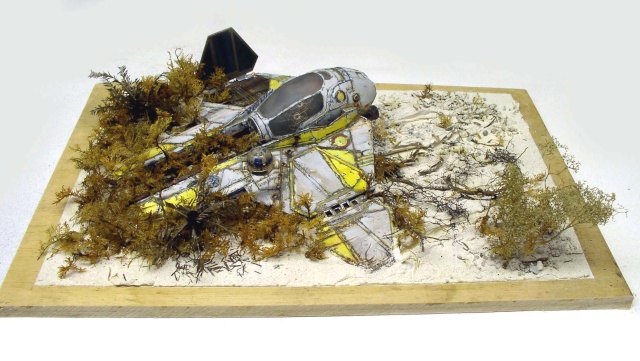
The fighter jet is supposed to have crashed in the forest after making an emergency landing following an attack. The base will be a piece of plywood—not too large, but large enough to allow for ventilation around the model. Leave a 2–3 cm border around the panel and protect it with automotive tape. Then apply a coat of white acrylic primer (Gesso) to make it waterproof. The ground is made from LIQUITEX MODELING PAST, but POLYFILLA or wall spackle can also be used and tinted for this purpose. The slow drying time allows you to arrange the vegetation, rocks, roots, and various accessories at your leisure)...
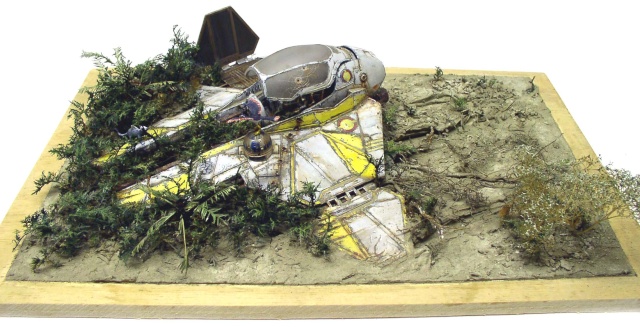
The entire diorama will be painted with HUMBROL oil paints: the ground using a mixture of 33 - 72 - 34, and the vegetation using 30 - 80 - 69 - 63 - 34...
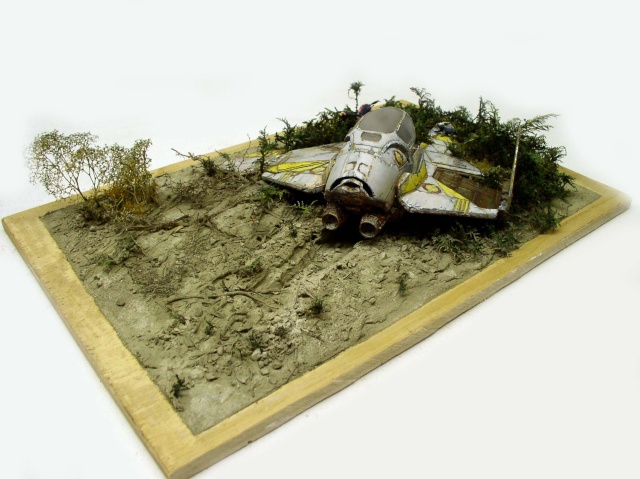
Don't forget to till the soil, which bears the marks of the craft's landing. The vegetation consists of moss collected in the forest and dried mimosa. Two animals are added to bring the whole scene to life...
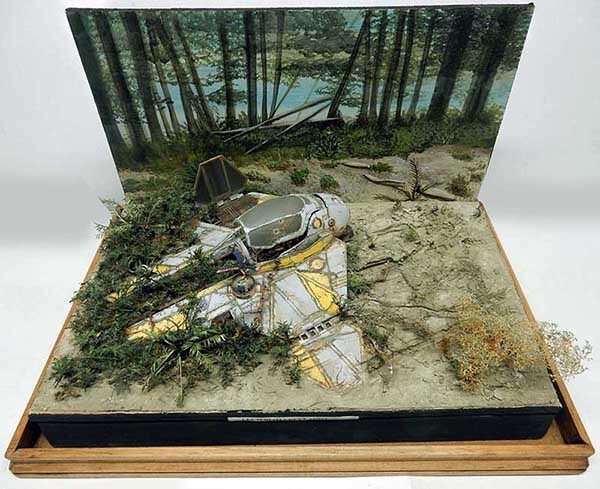
The set is finished. A background painted with acrylic paint will add the finishing touch...