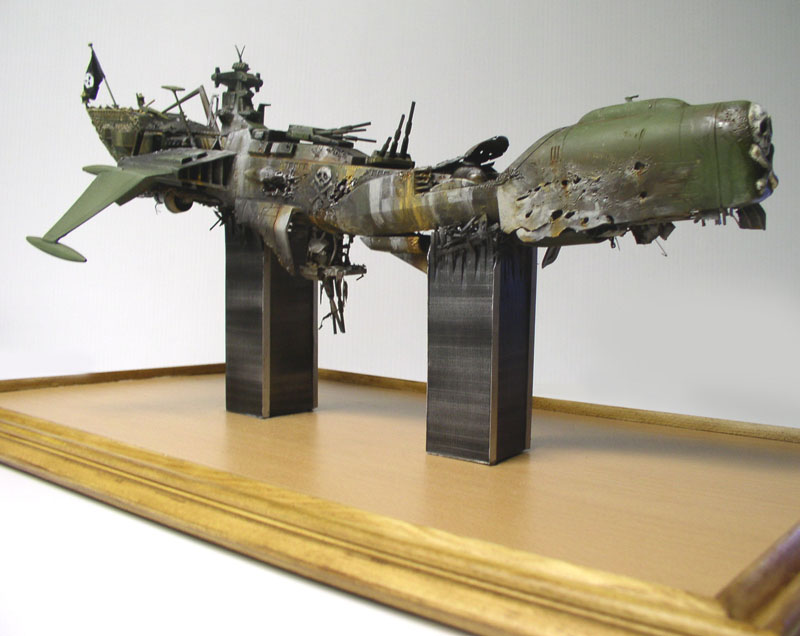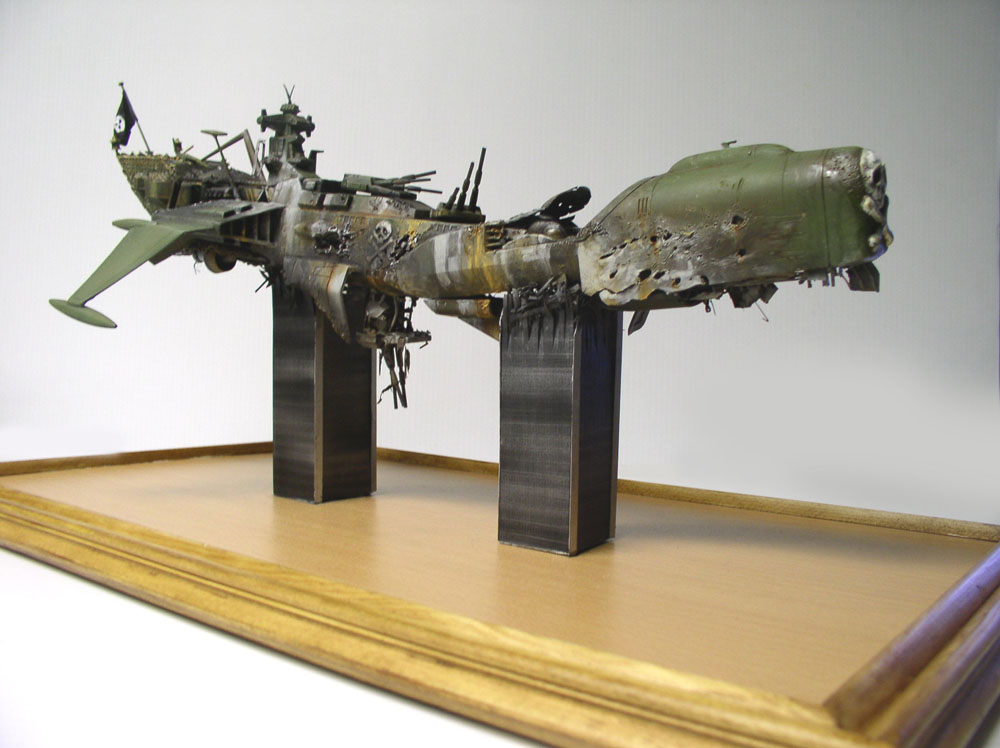
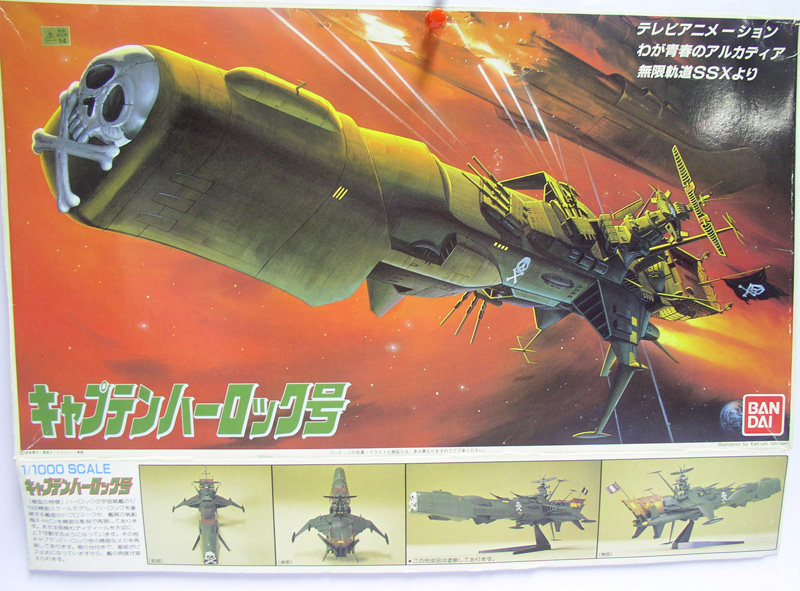
Arcadia. One of the models from the famous series—Albator 78 & Albator 84—which aired and was rebroadcast in France and was created by the artist Leiji Matsumoto...
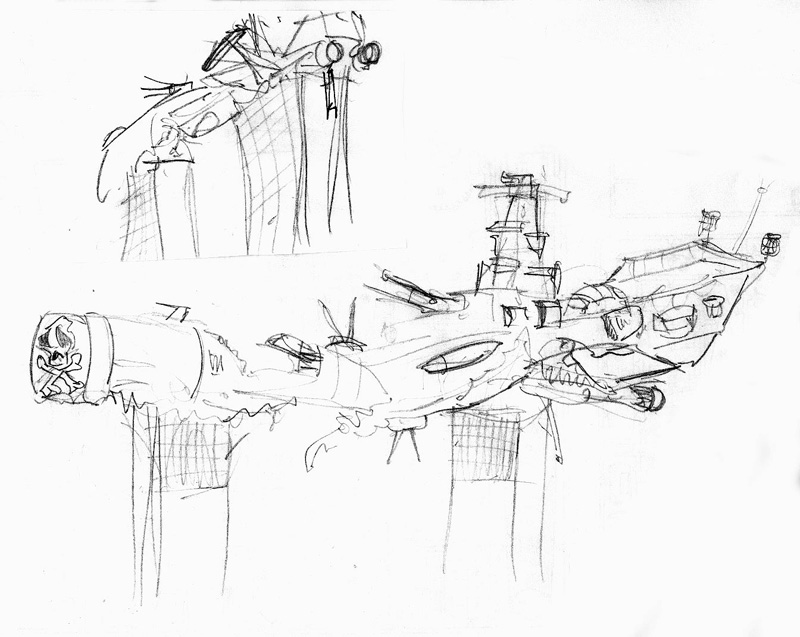
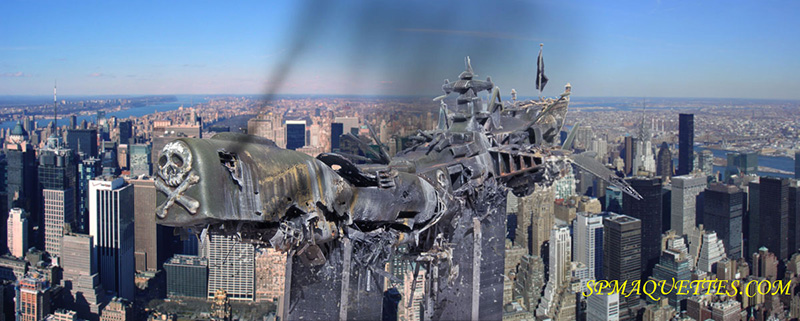
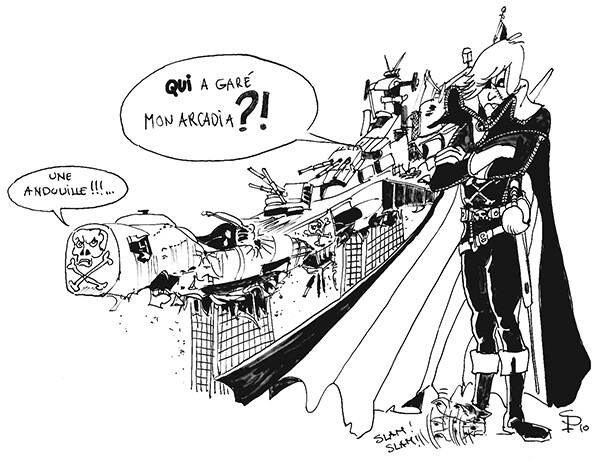
The ship, returning from a piracy mission, didn't have time to land. Since the ship had "crashed" into two towers (???), drawings were needed to visualize the whole scene...
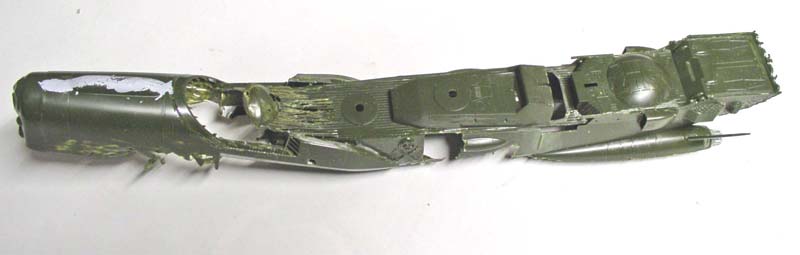
Step 1: Assembly. Roughly attacking this poor model with a saw and a sander... The two parts of the hull had already been glued together...
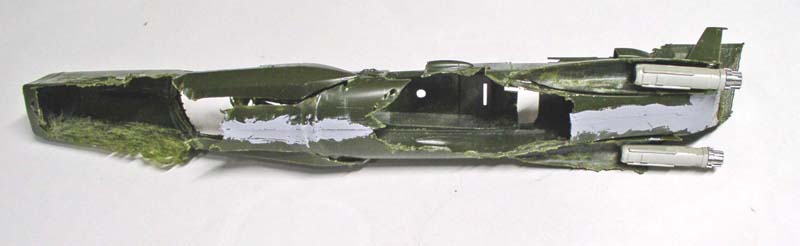
Then the front third—at the bulges—is cut with a saw to create a fractured effect and raise this section relative to the rest of the vessel. After filling and sanding the visible seams, all torn-off metal sheets and damaged open sections are ground down to refine the metal as much as possible and deform it (let’s not forget that the scale is 1/1000th). The bow thrusters—consisting of just two nozzles—are replaced with others taken from the surplus box. These must be clearly visible, as their fairings were destroyed in the crash...
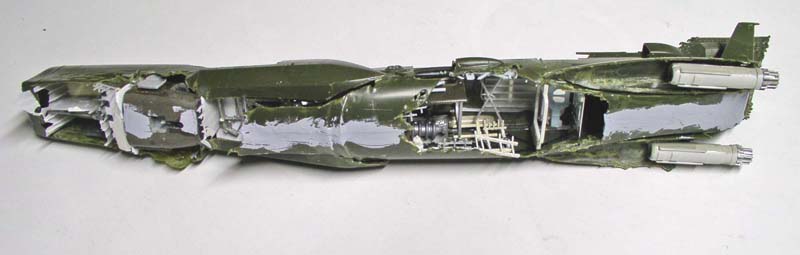
After demolition comes construction! Once the holes are drilled, it's time to fill them in! Using a cutaway diagram, we can identify and reconstruct the parts and sections of the model...
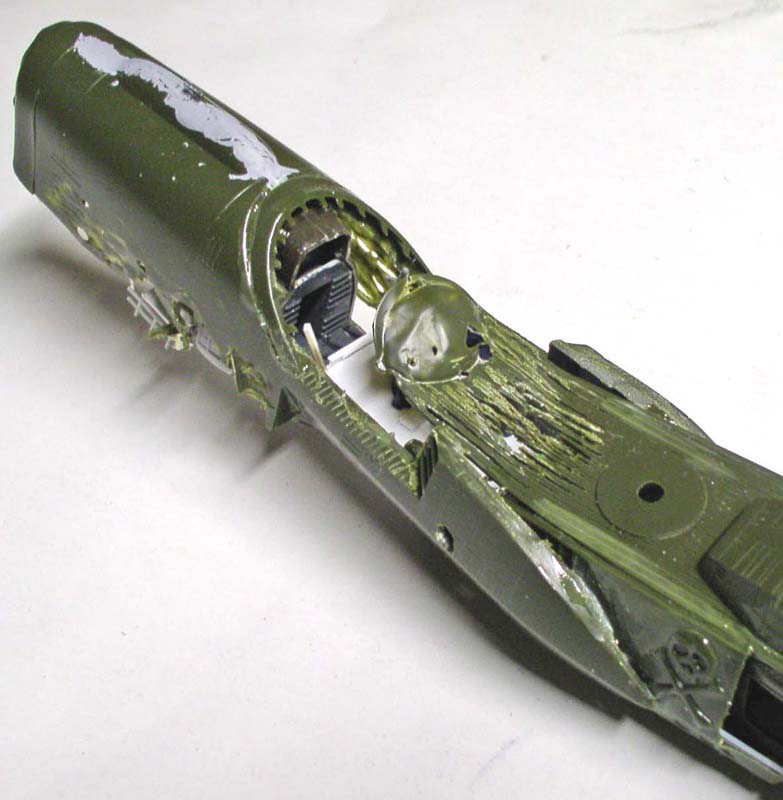
Close-up of the bow. You can see the rolled deck and the dome housing the main reactor; the white section is the reactor deck... You can see that the bow is raised slightly, in the shape of an inverted circumflex accent...
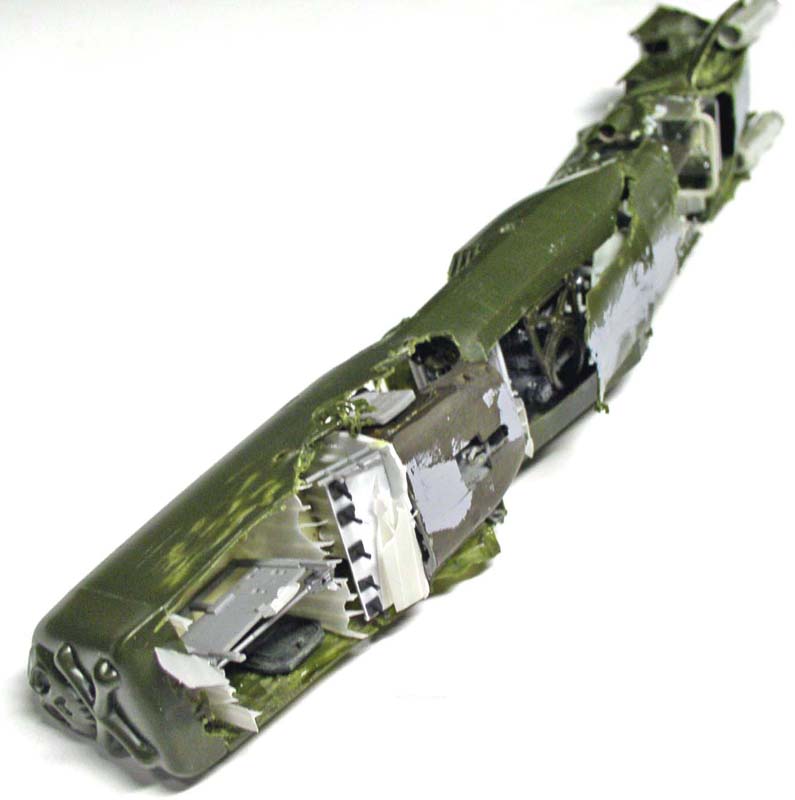
Another view of the bow showing the layout of the various cargo hold compartments and sections. The ship is enormous. The figurines would be about the size of the head of a small pin...
The Towers
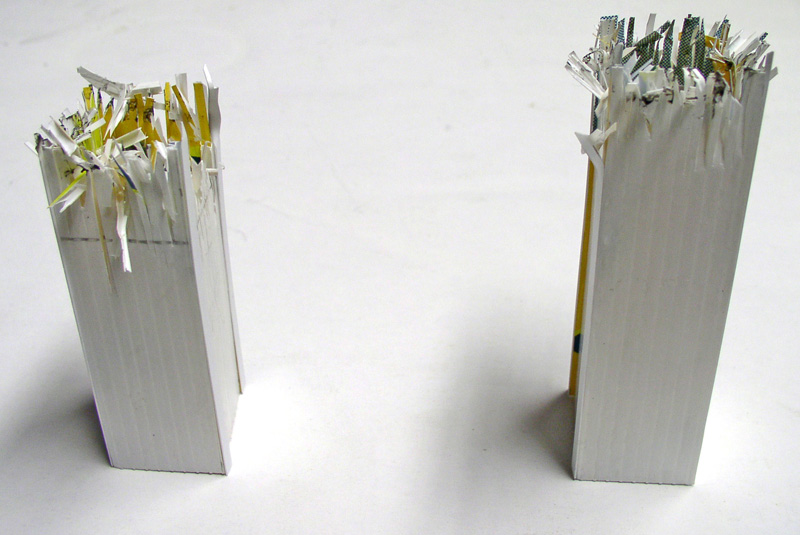
The twin towers that will serve as the base for the model are made from plastic card and Evergreen rods...
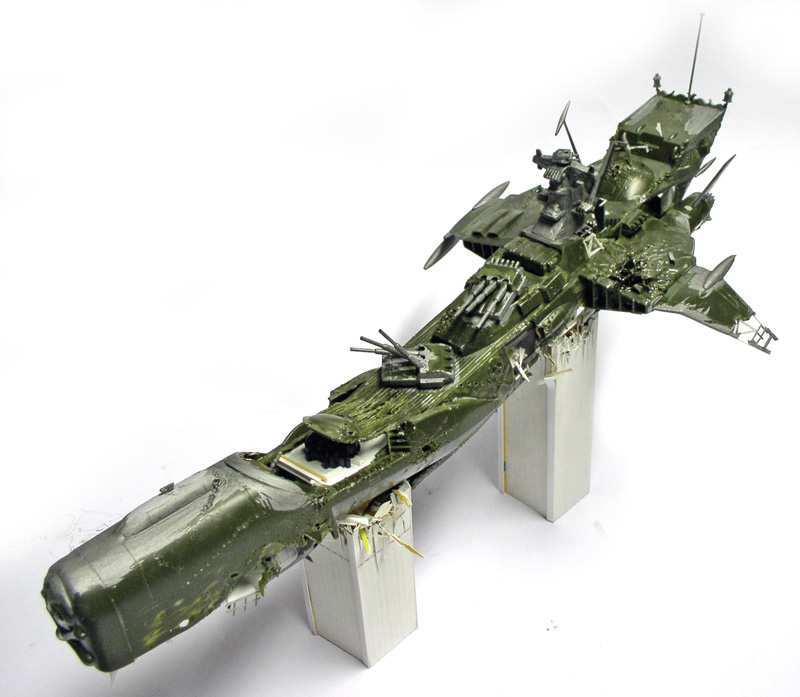
View of the model in place... The laser-fired impacts and various explosions on the hull were created using a pyrography tool (they'll be more visible in the photos showing the painting stages...
Ship Details
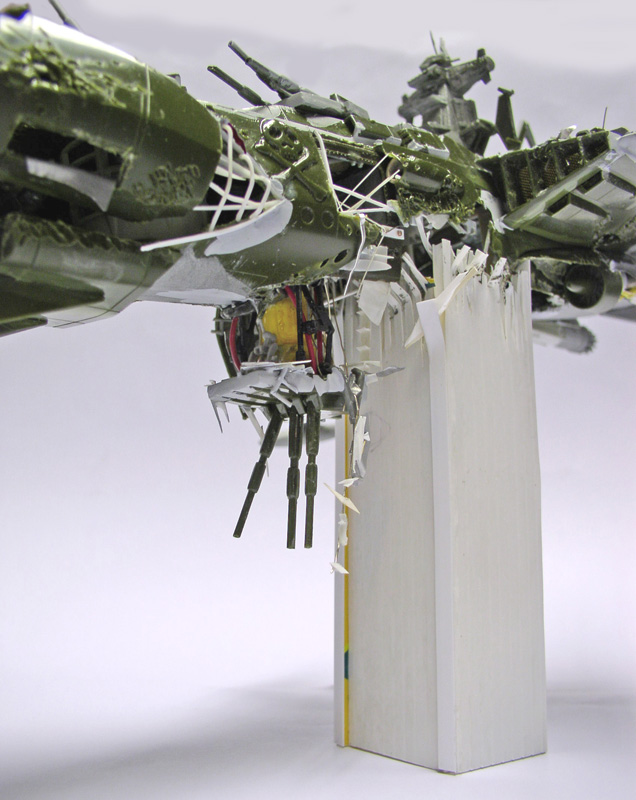
A side view showing the hull's exposed beams and the ventral turret, which has been torn from its mount and is hanging beneath the aircraft...
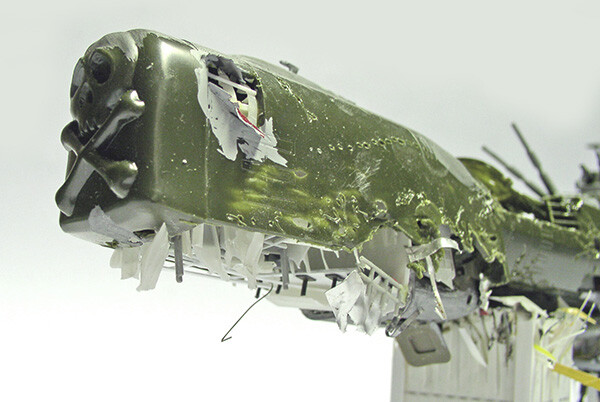
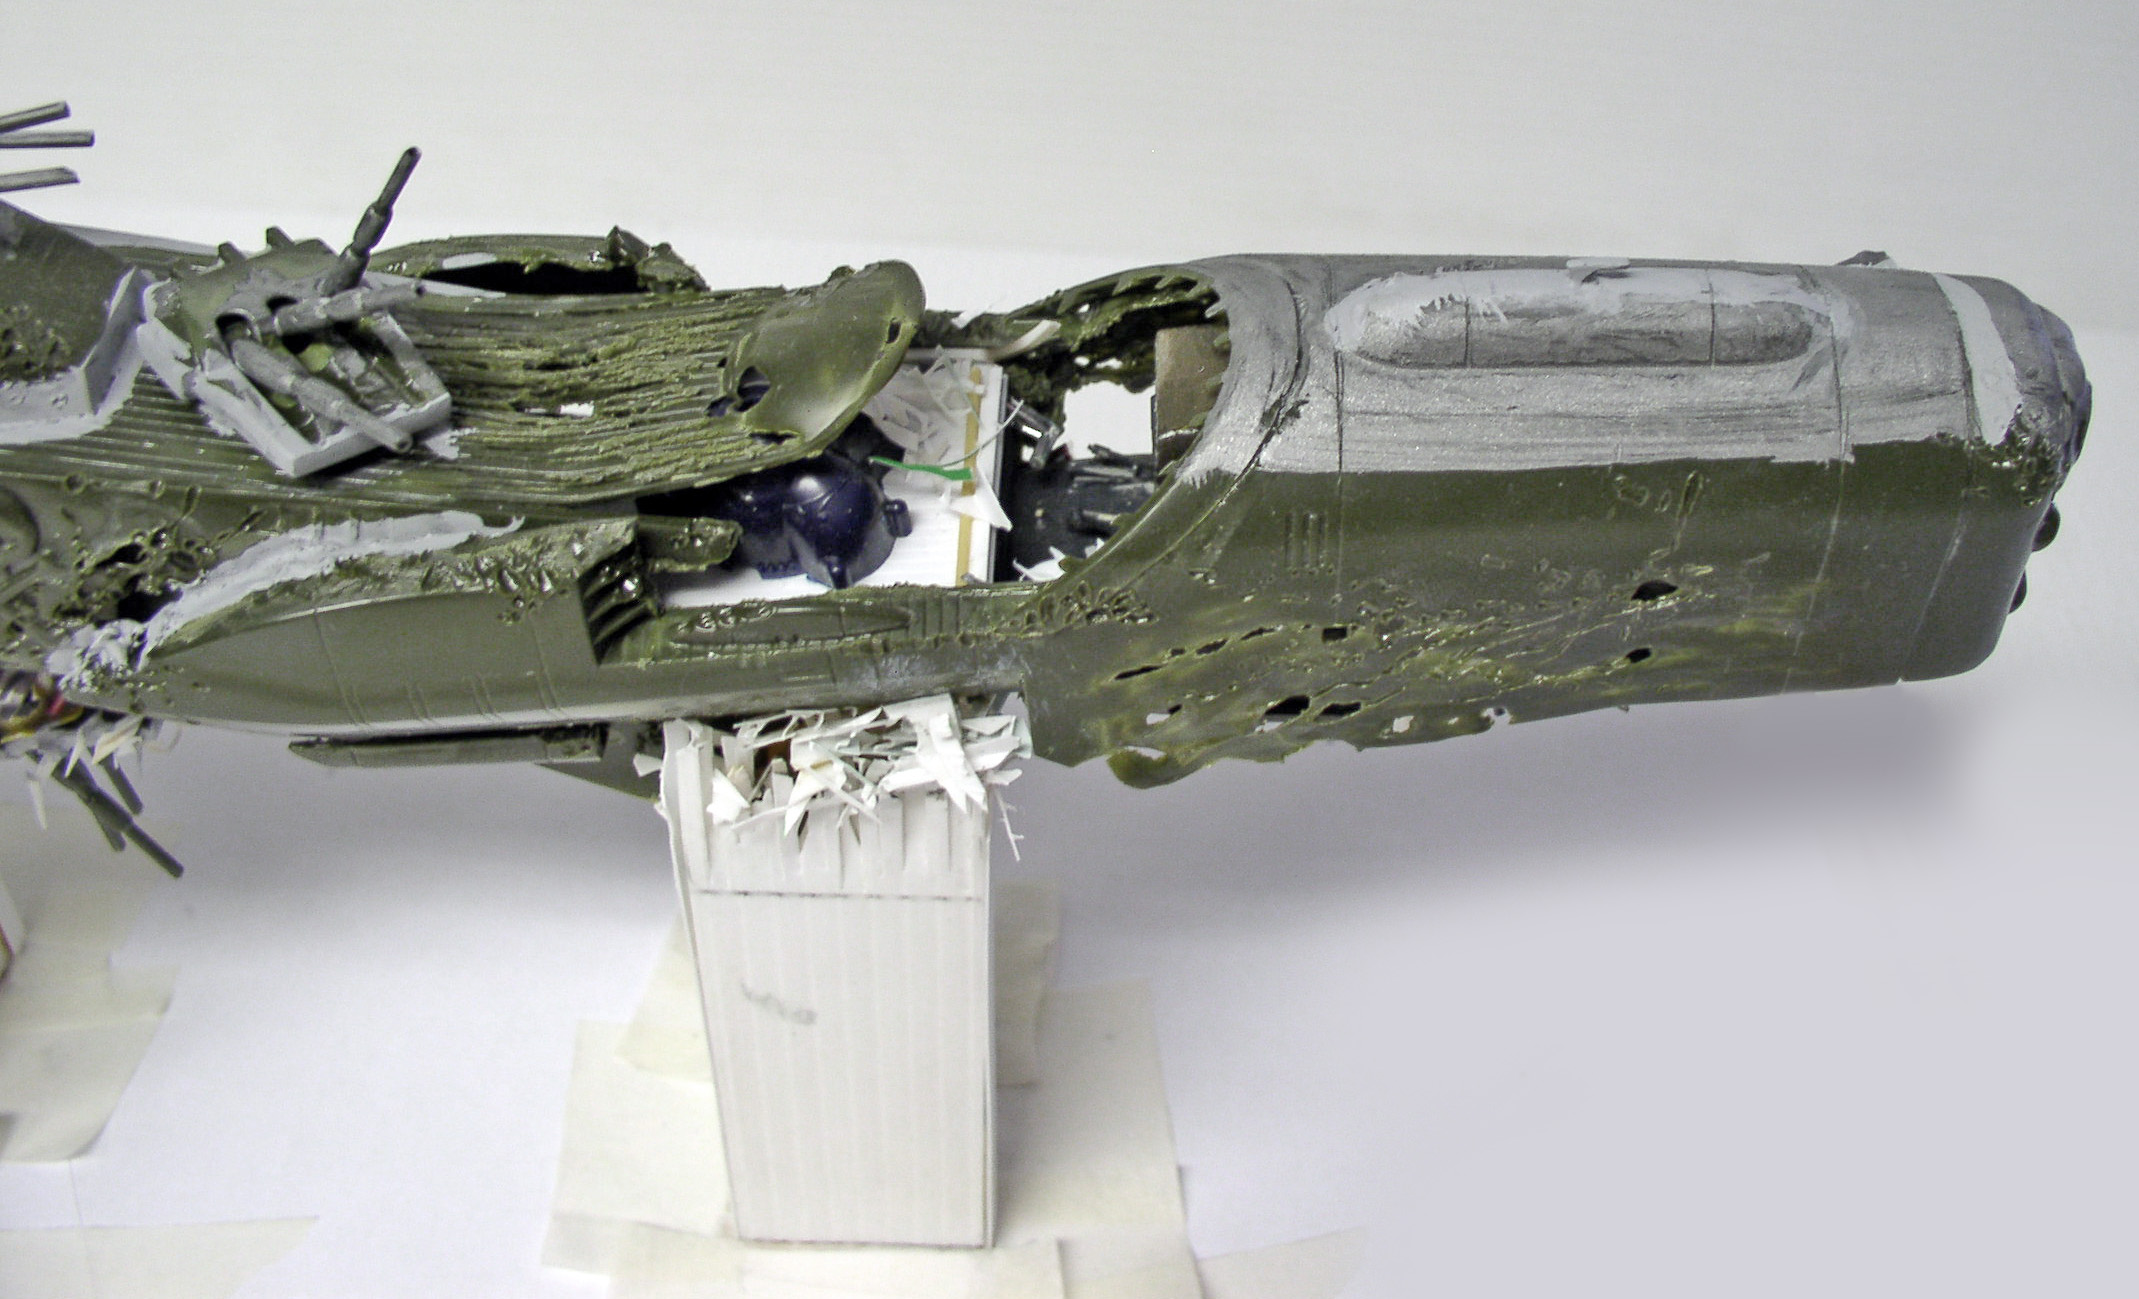
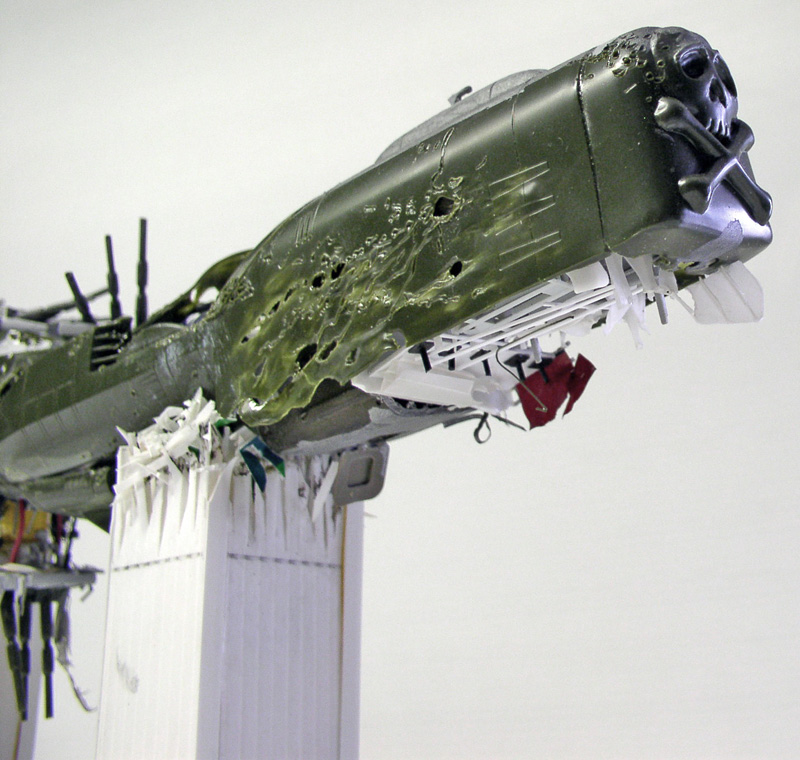
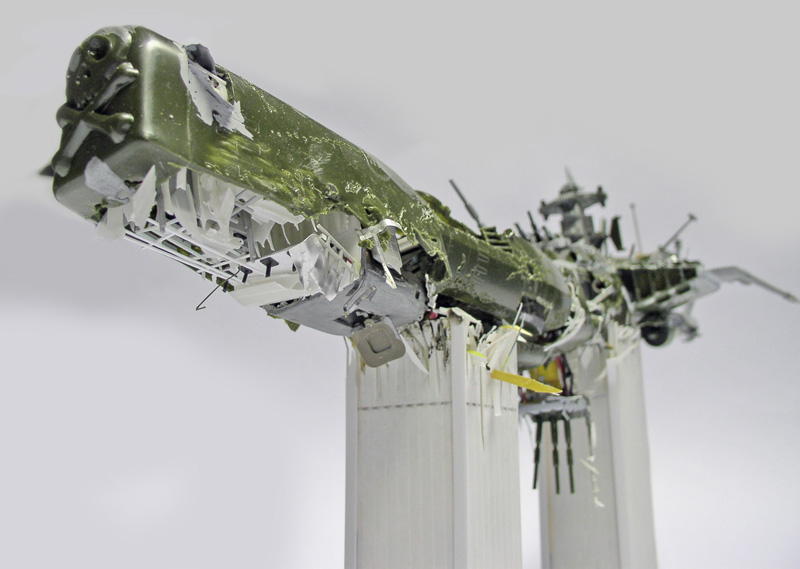
The four photos above show the progress of the "work." You can clearly see on the bow the effects of the plastic warping and the refinement of the metal sheets to better match the scale...
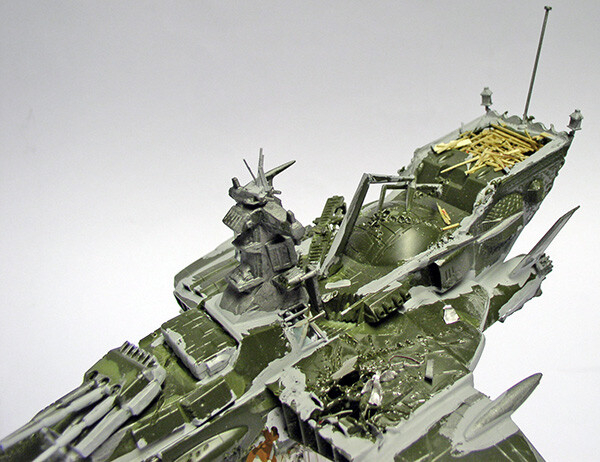
The central castle is treated in the same way. The various two-part pieces are glued together, filled, sanded, and positioned...
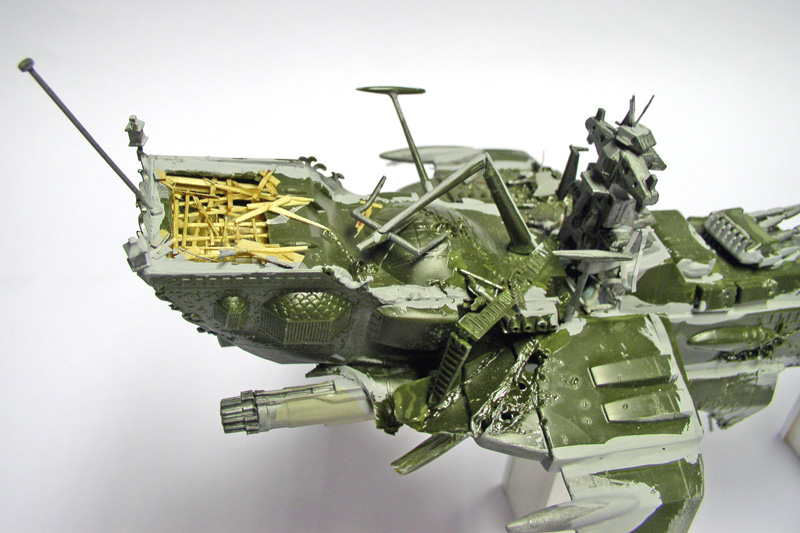
Since the stern is the rear end of a galleon, the exploded view of the deck structure is made of balsa wood...
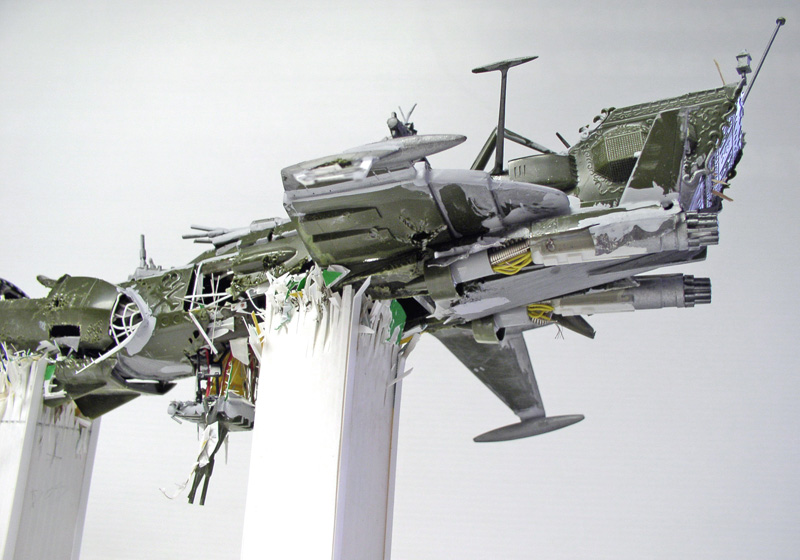
The reactors are meticulously detailed using wires and small parts...
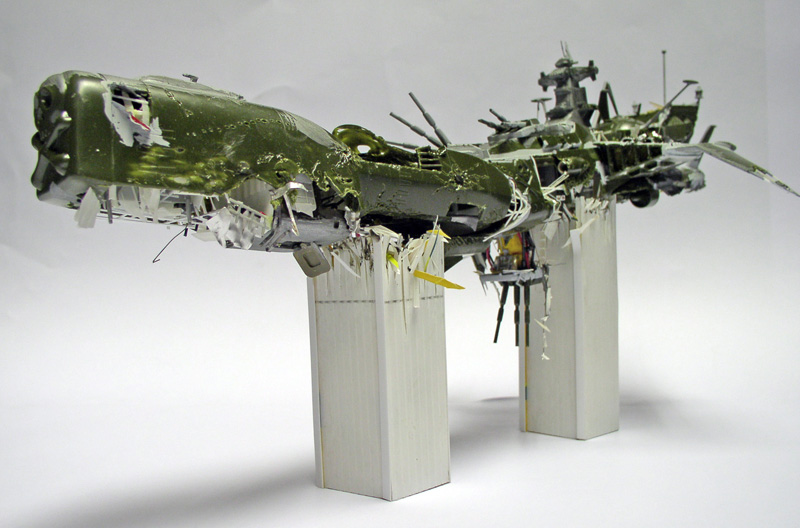
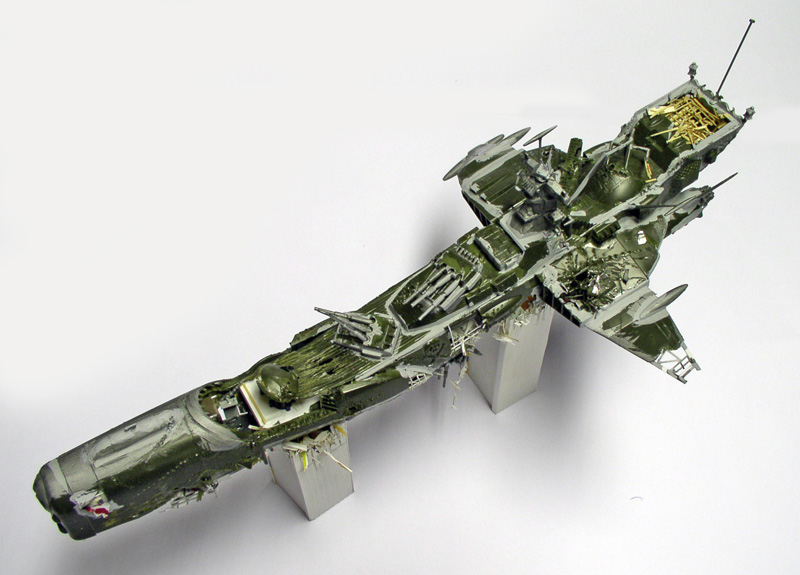
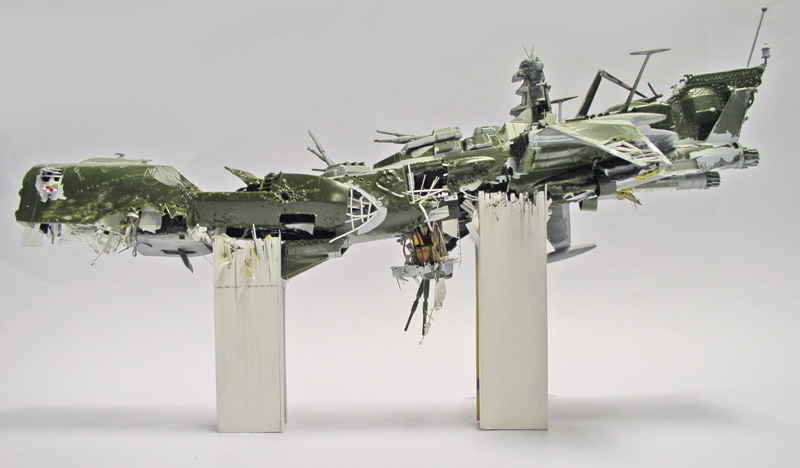
Three overview shots of the assembly of the nearly completed model...
The base
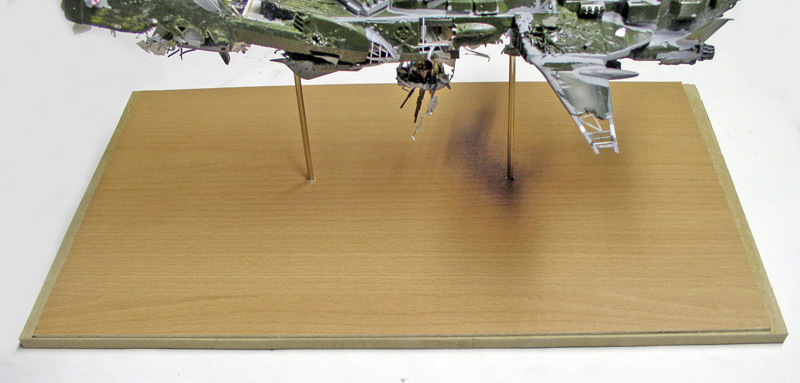
At this stage, you need to start thinking about the permanent base to stabilize the entire structure before painting. Two rods threaded at one end are attached to the base, which consists of an MDF panel covered with wood veneer. Two nuts are used to secure the rods from below...
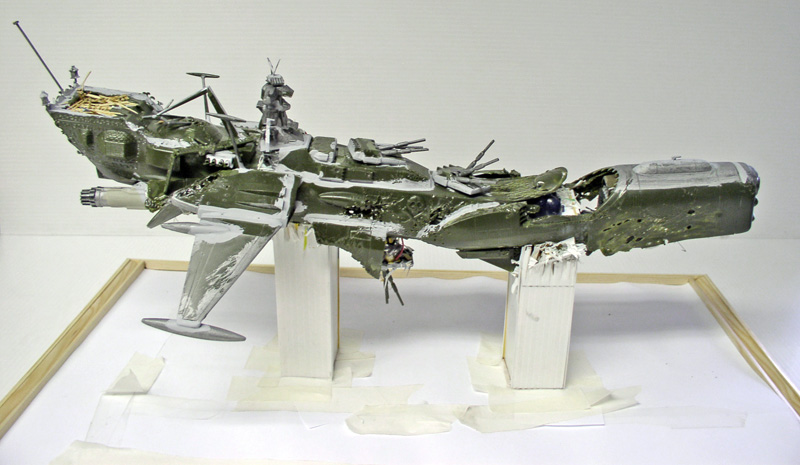
The towers are glued to the floor, and the ship is glued to the rods and towers (a tricky part). We cover the floor to protect it from paint splatters...
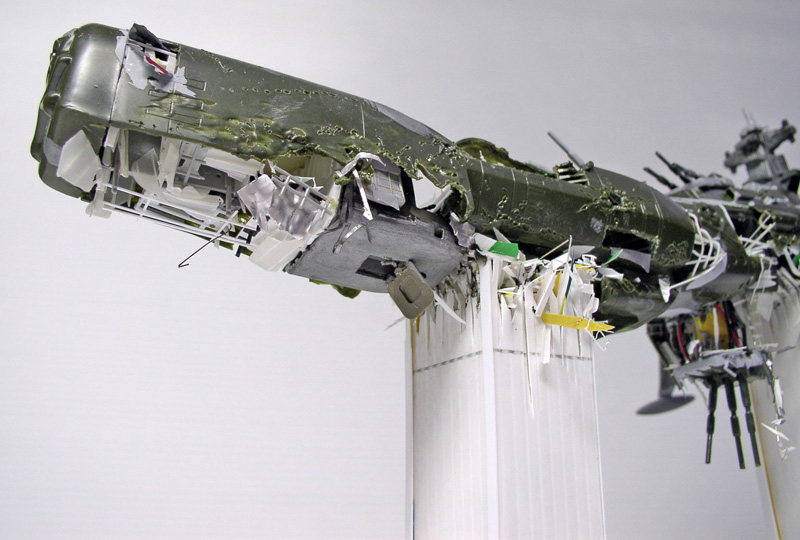
Now that this is done, we can continue to depict the destruction of the towers in greater detail by adding numerous beams and various deformed parts, and connect them to the spacecraft...
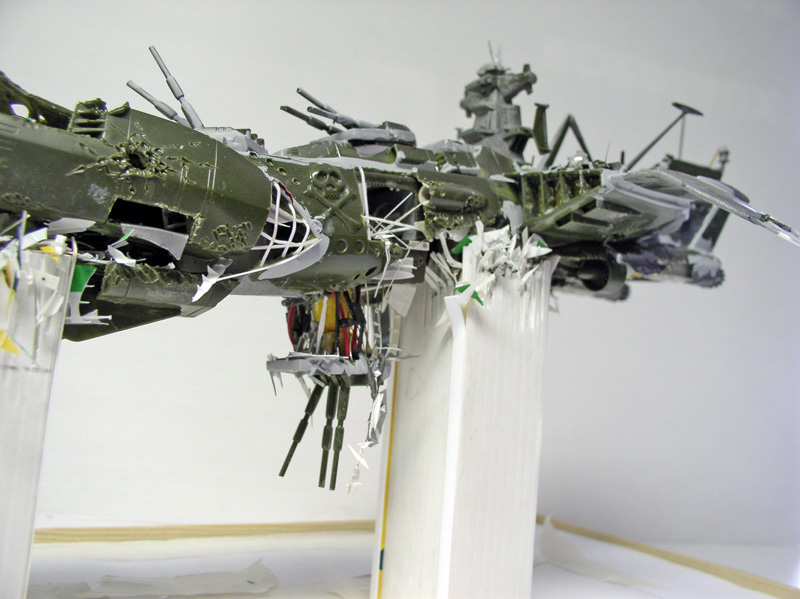
Same goes for the second tower...
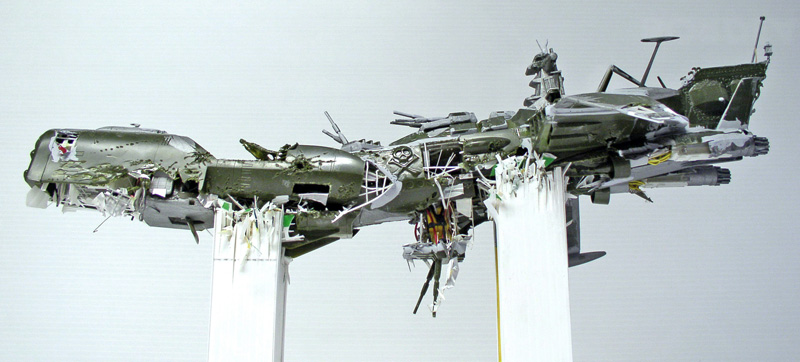
The ship—in all its "splendor"—ready for the painting phase...
Painting
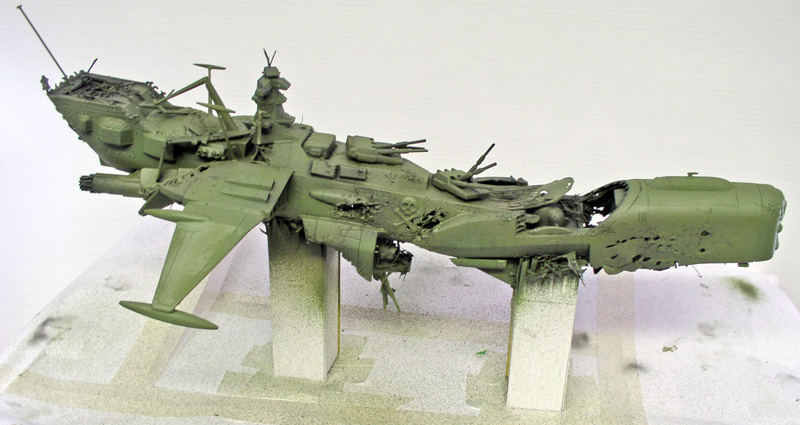
Humbrol & Testors Model Master oil paints. Since the Arcadia is green, the base will also be green... Five different shades of green will be used to shade the base. (Not very visible here...). The goal is to apply highlights with an airbrush to create a sense of depth and initial shading. 91, 105, and 150 for Humbrol; and Dirty Olive and Rubber for Testors Model Master...
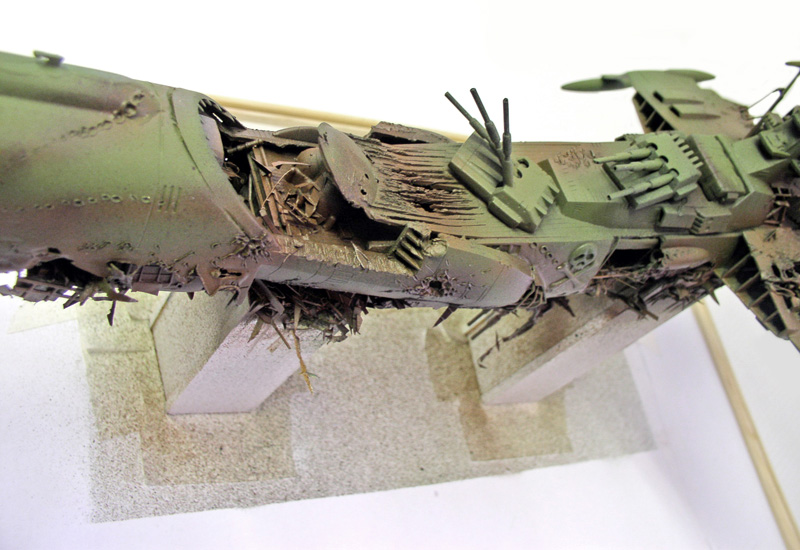
The next step is to airbrush the damaged areas and darken the interior. Use Humbrol black as a base, and Testors Model Master leather and rust. Always start by spraying the dark colors first, then move on to the lighter ones...
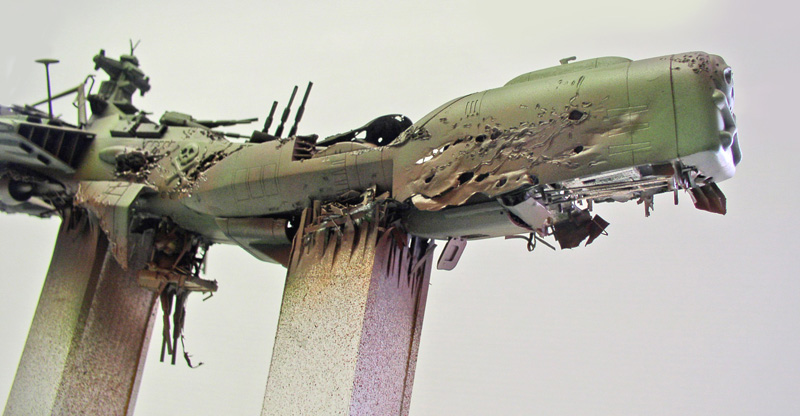
View from below...
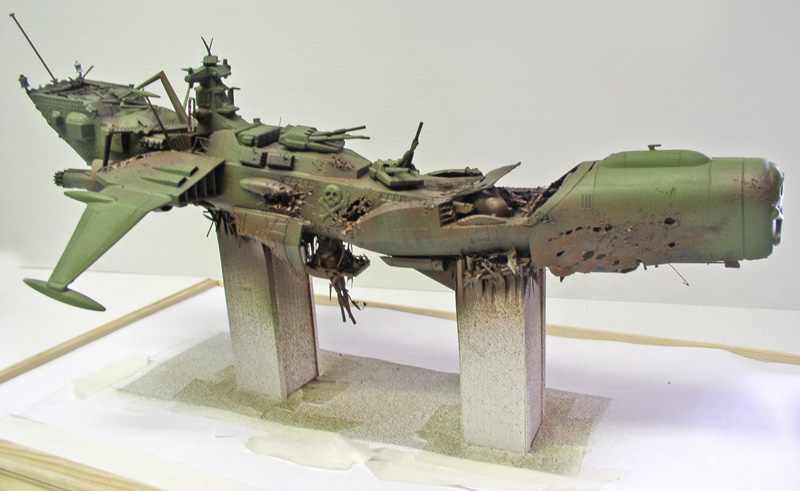
Overview of the basic colors...
Juices
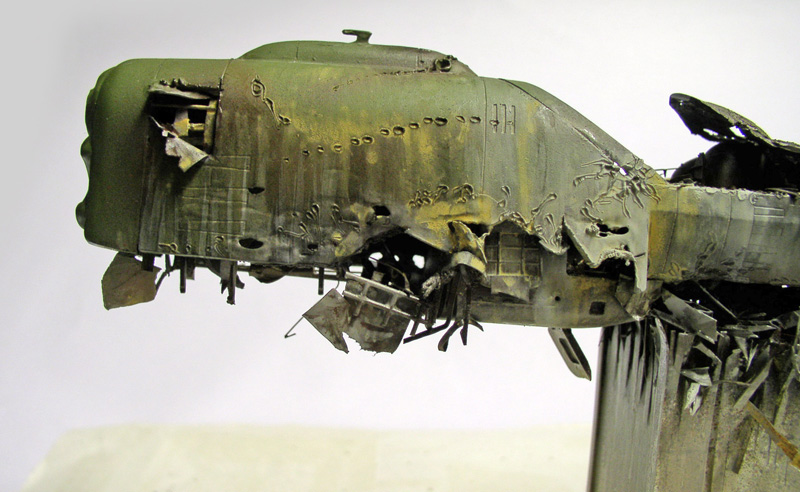
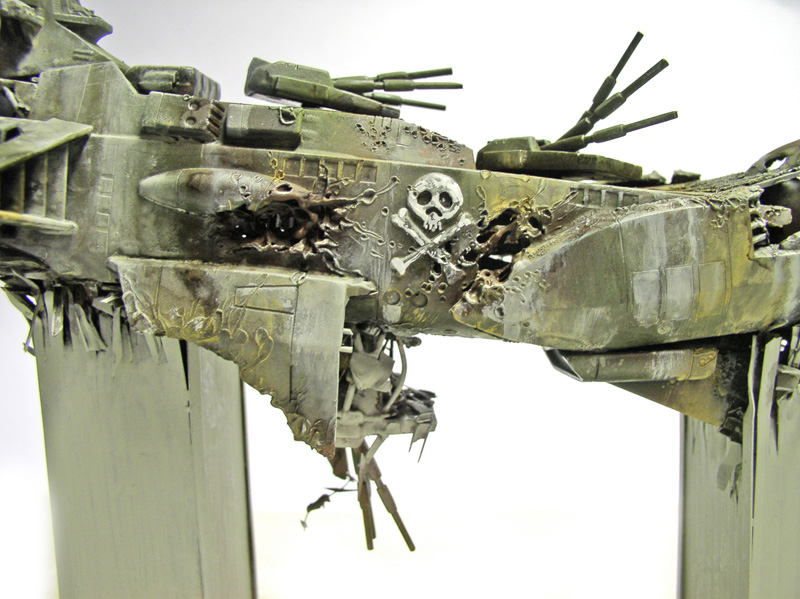
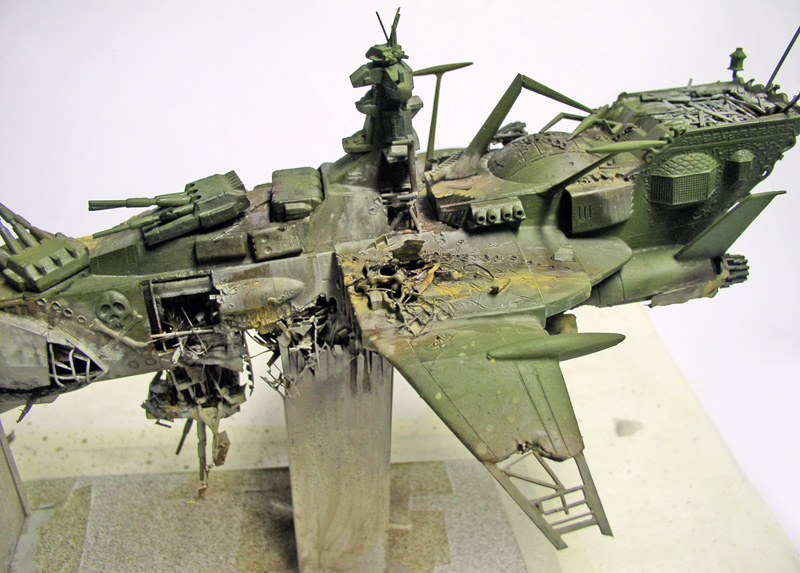
After the base colors have dried, apply a wash diluted 50% with black and rust; after wiping it off and allowing it to dry completely (24 hours), a dry-brushing technique is applied using a flat brush—preferably made of sable hair—starting with 150 for green — 63 — gray 183 — Humbrol white for the damaged areas, and Testors Model Master rubber and rust...
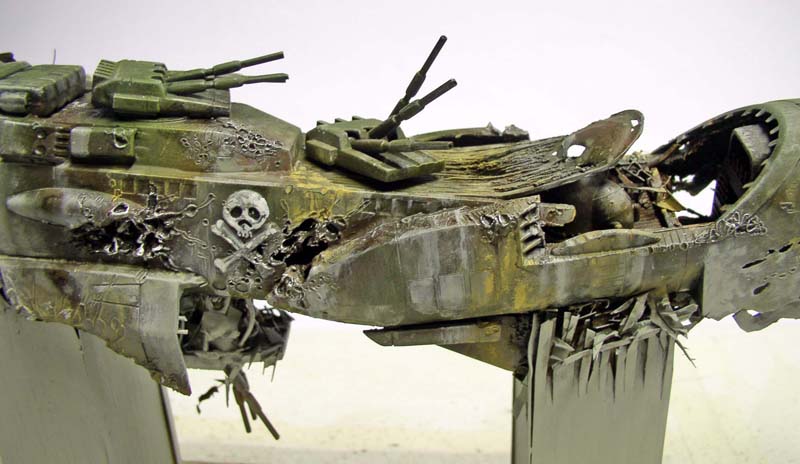
The shredded metal sheets are dry-brushed with Aluminum 53, followed by Silver 11 to highlight the details...
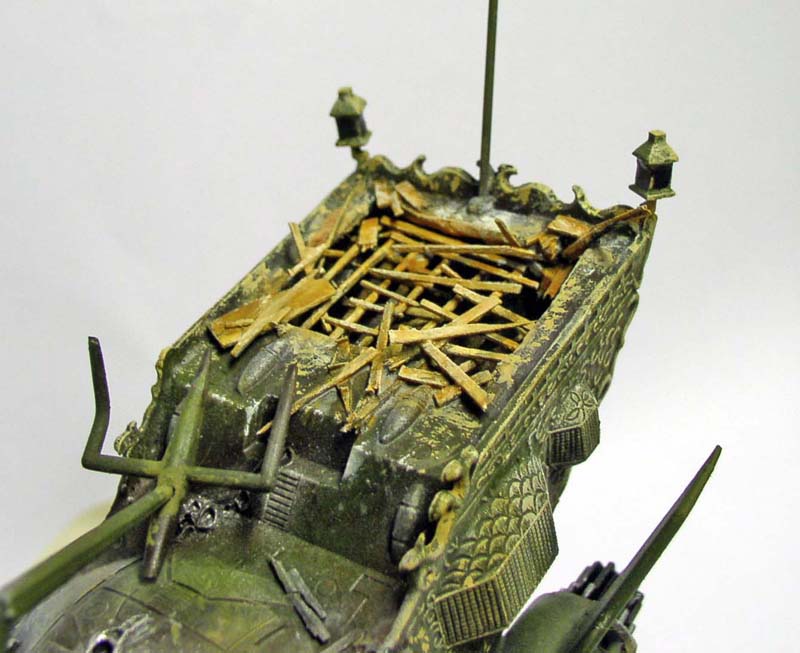
The exploded view of the galleon's framework is painted with Winsor & Newton artist's oil paints—Umber, Ochre, Naples Yellow, White...
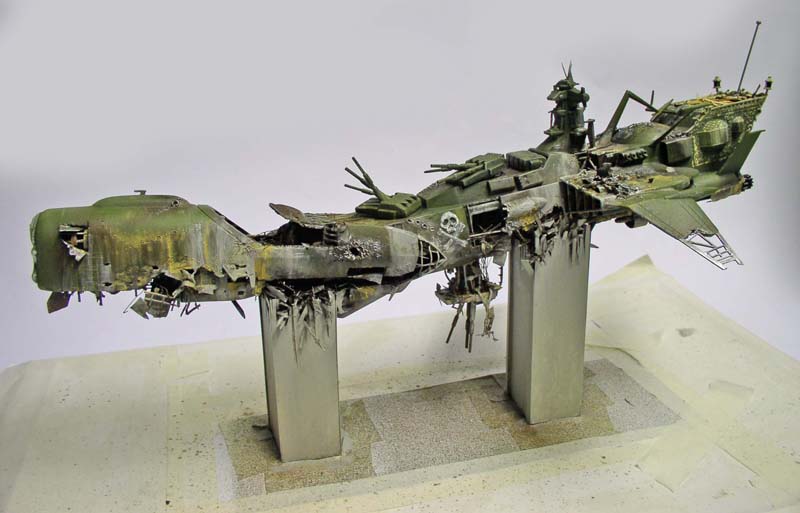
View after the various stages of painting...
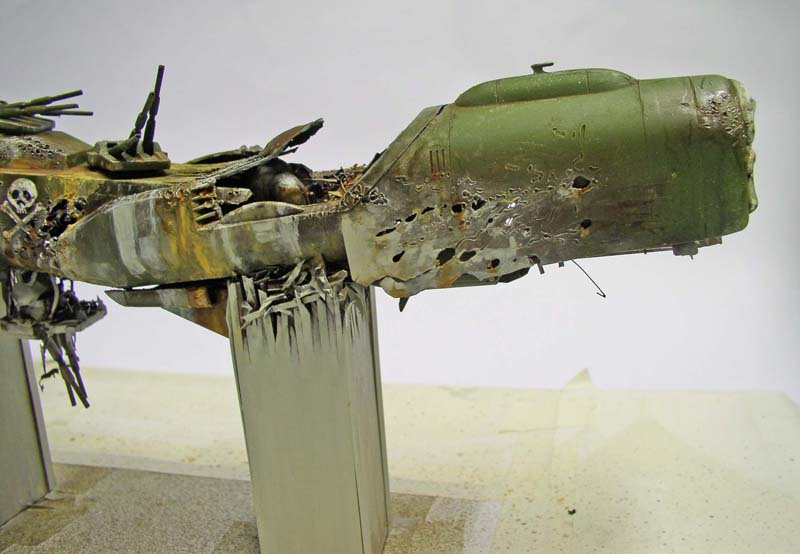
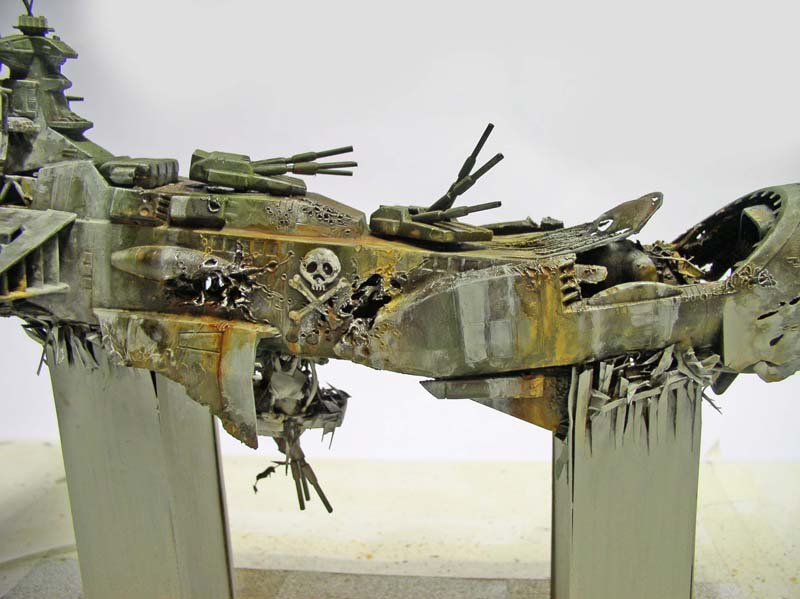
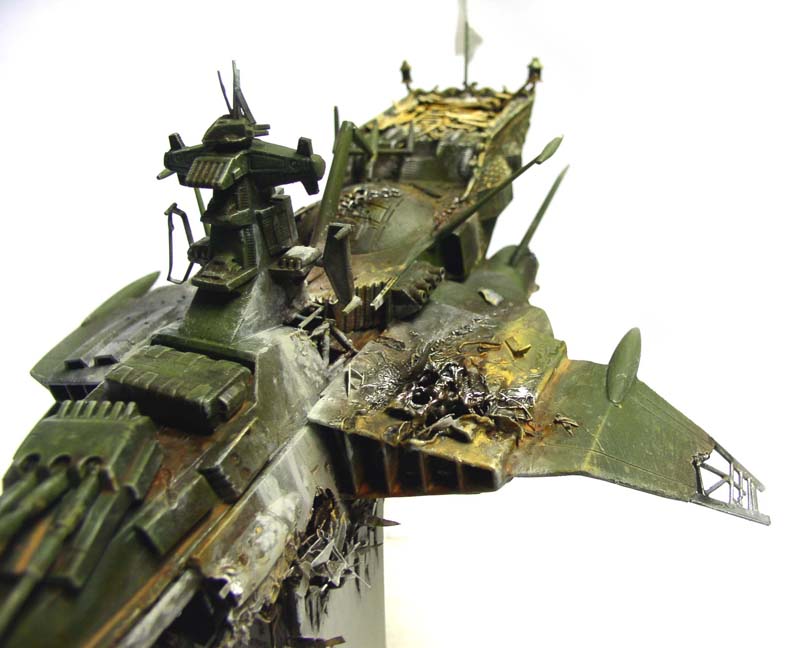
We continue the aging process by adding washes and streaks of color with a fine brush using black, umber, sienna, yellow, Naples yellow, and white (Winsor & Newton)...
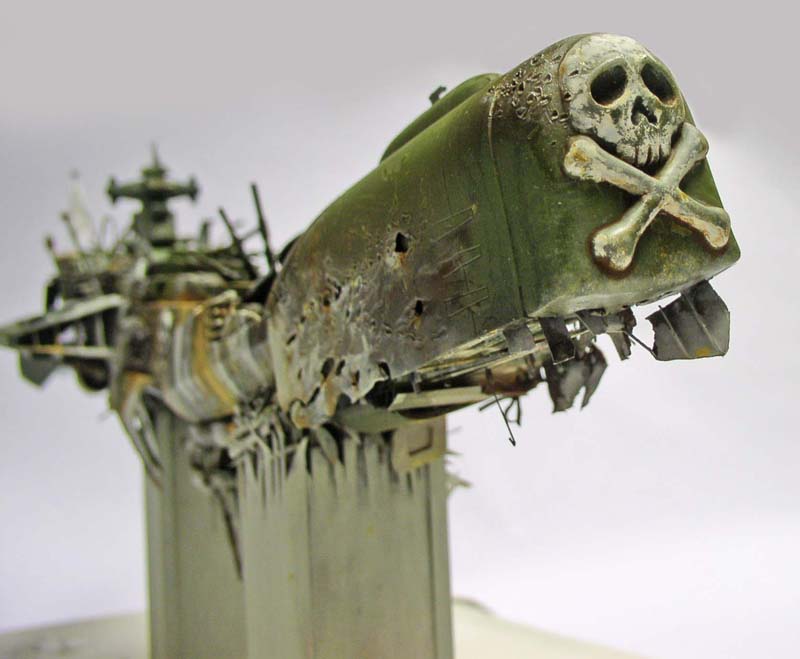
Painting the ship's emblems on the front and sides...
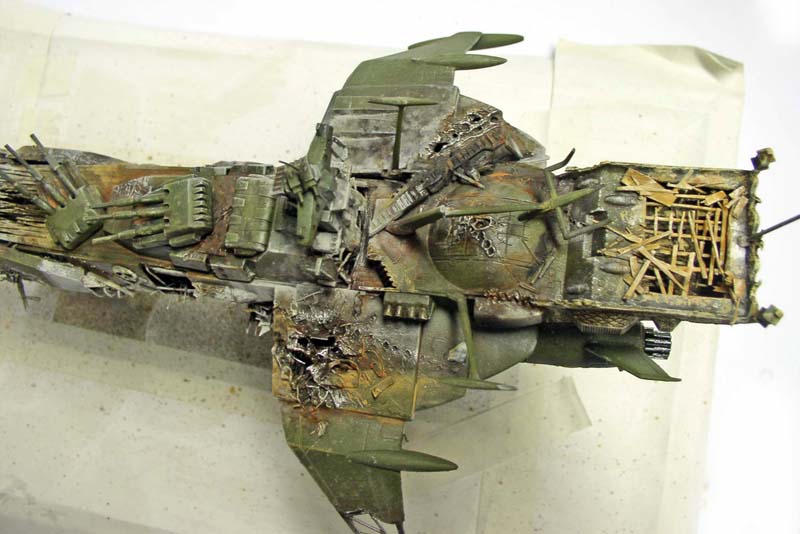
Top view. The damage is getting worse!...
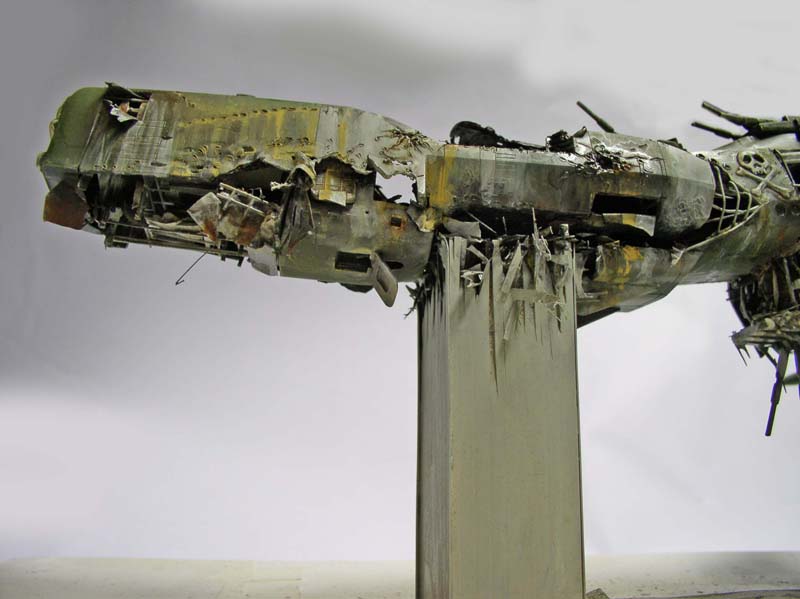
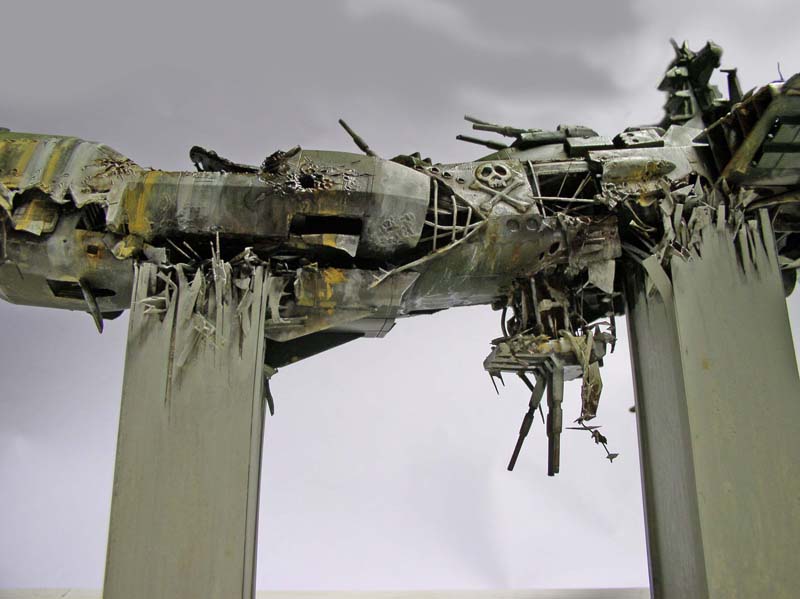
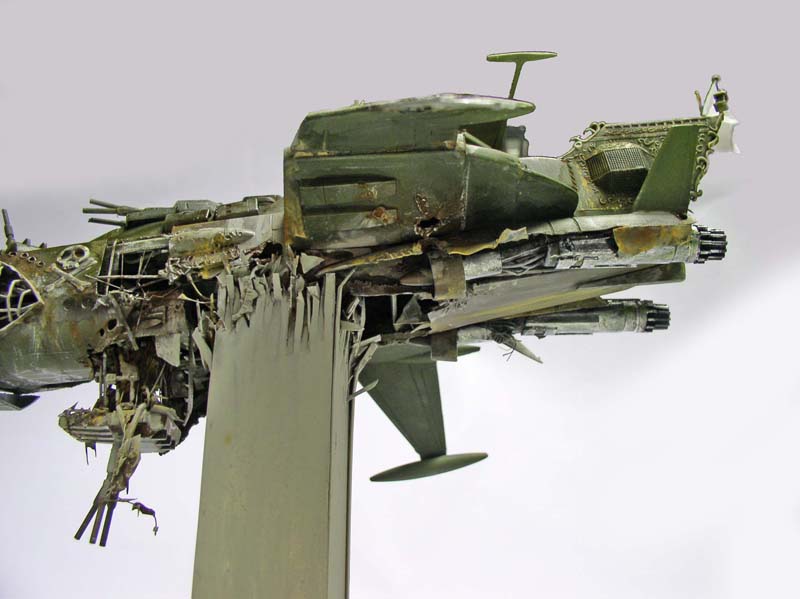
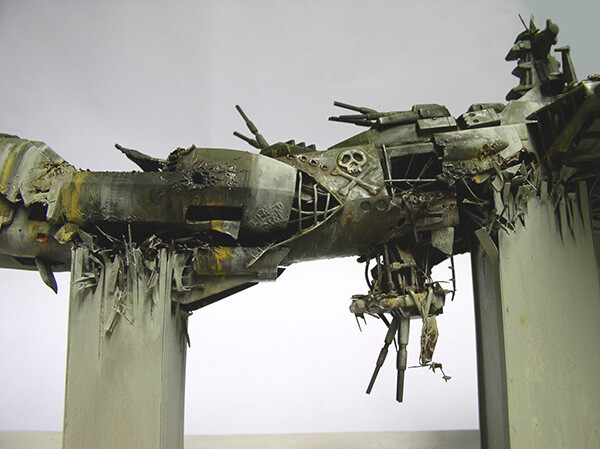
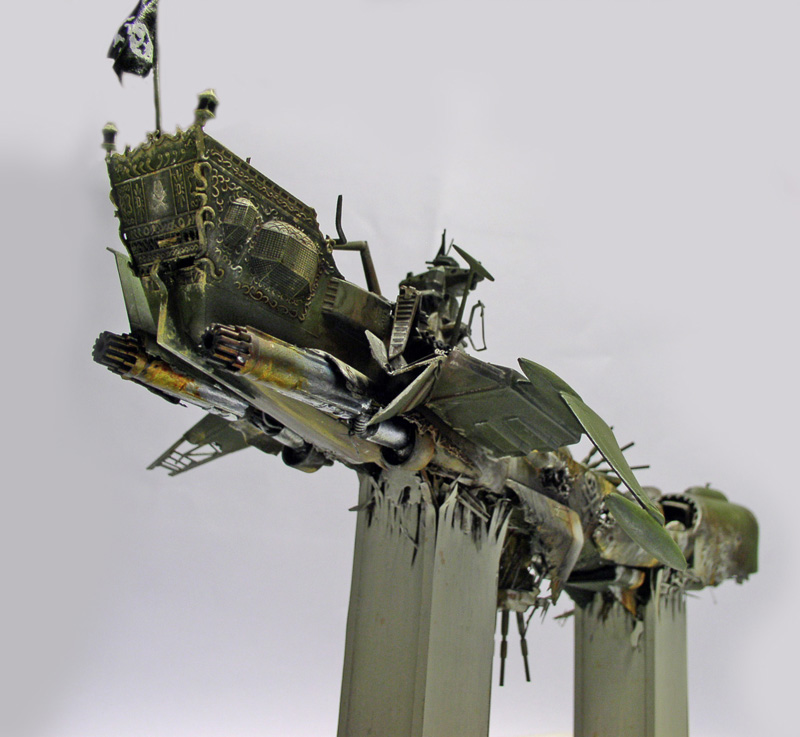
After applying a silver base coat, the engines are (in this case) painted with Tamiya acrylic translucent paints...
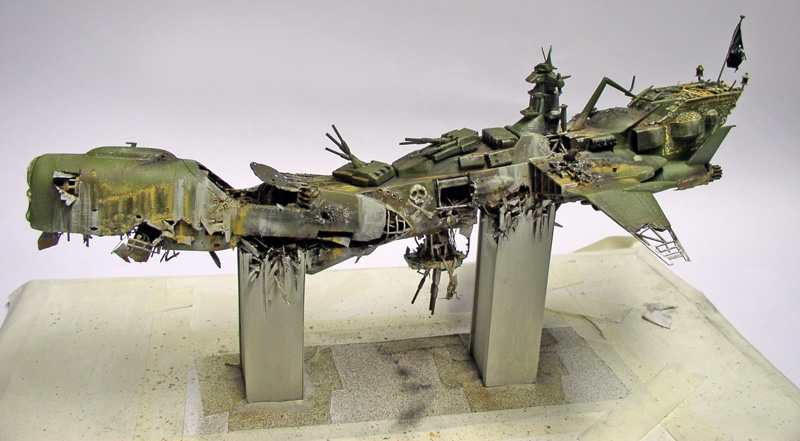
The painting of *Arcadia* is finished...
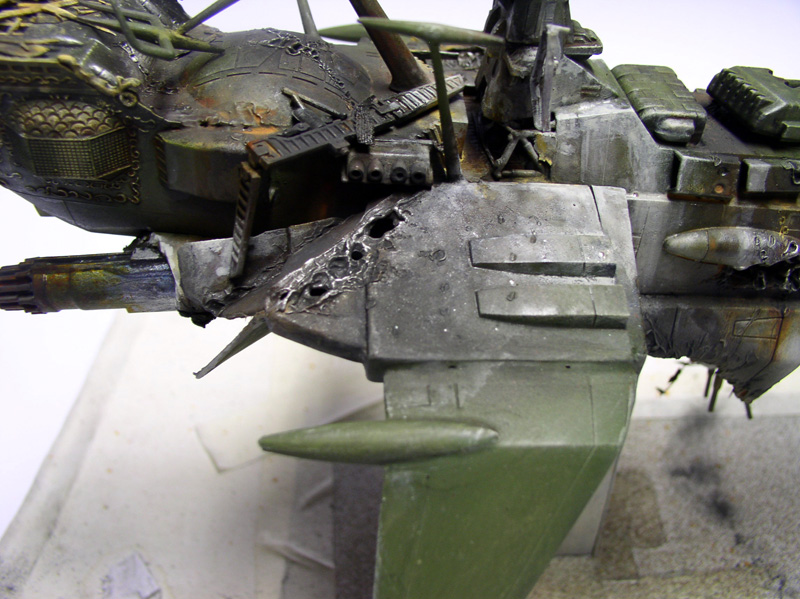
We finish the weathering process by applying black pastel powder and rubbing it in with a dry brush on the areas that have been damaged by fire and explosions...
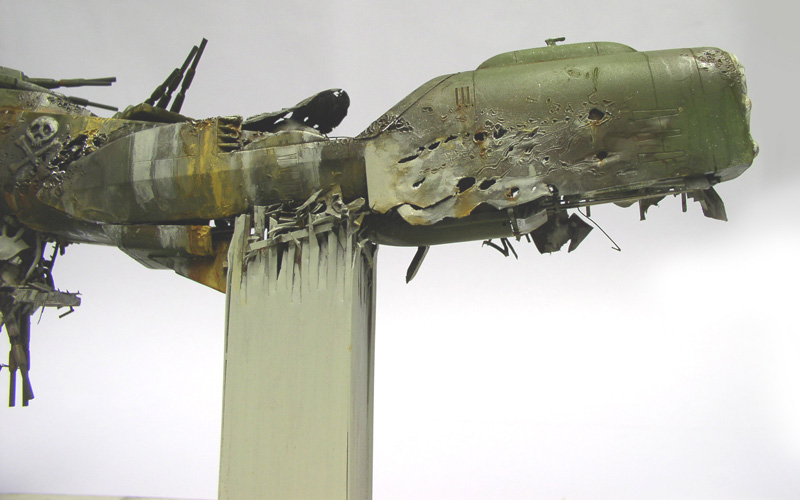
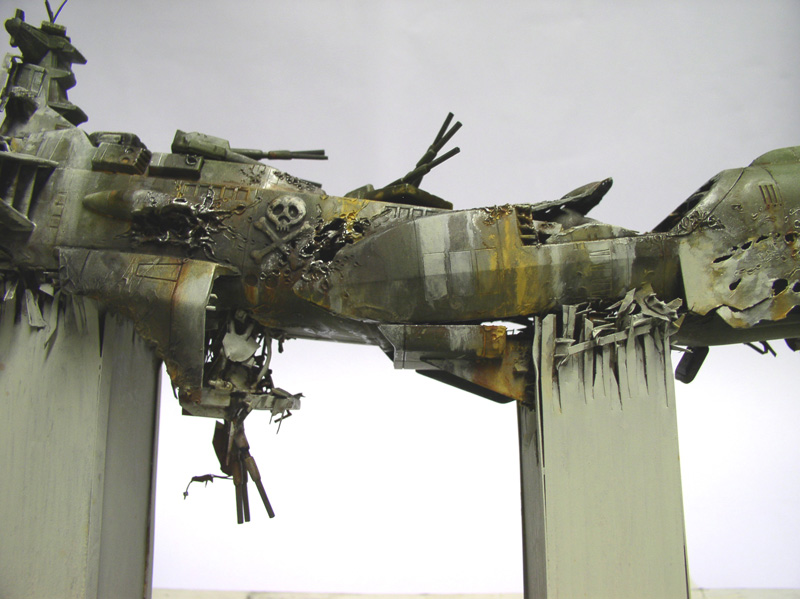
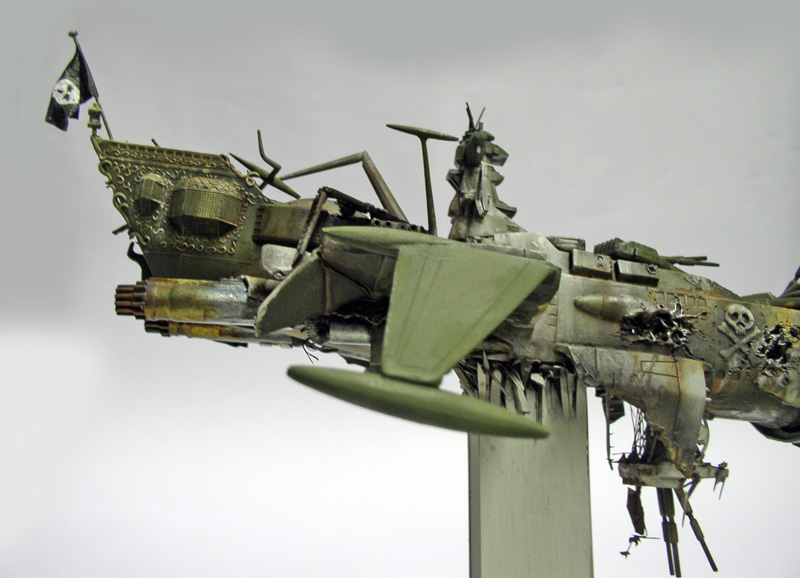
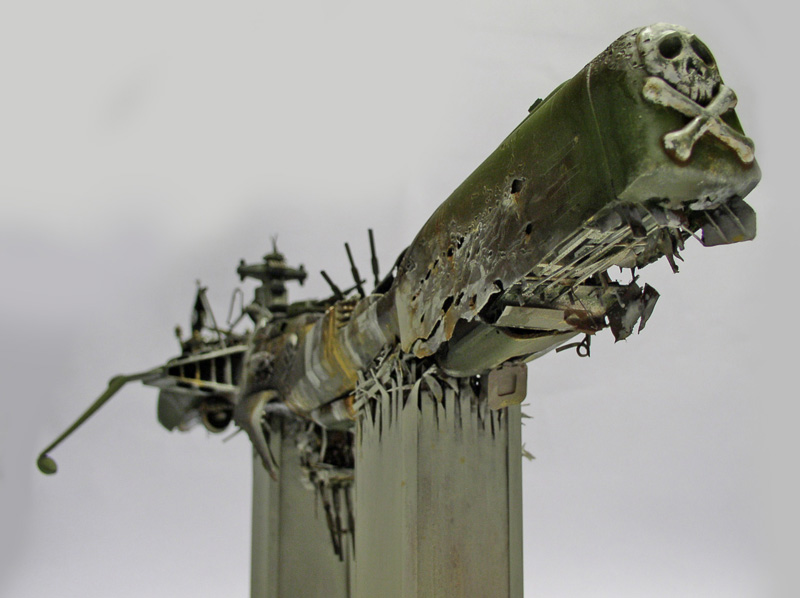
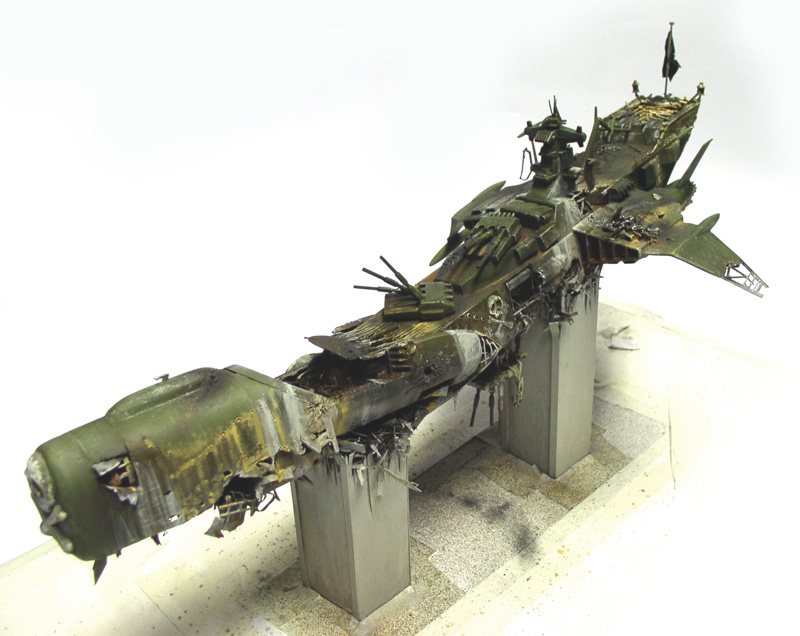
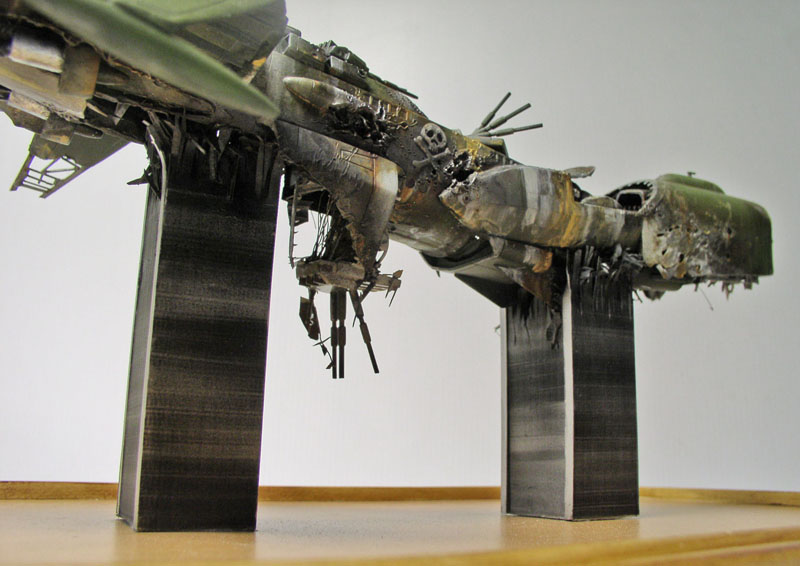
The towers are airbrushed using Testors Model Master black chrome trim and silver. Photo-etched parts will serve as stencils to simulate the windows (let’s not forget that we’re working at a 1/1000 scale). The diorama depicts only the TOP of the towers, so there’s no debris on the ground...